How to Make & Embroider a Rope Bowl

Instructions to Sew a Rope Bowl
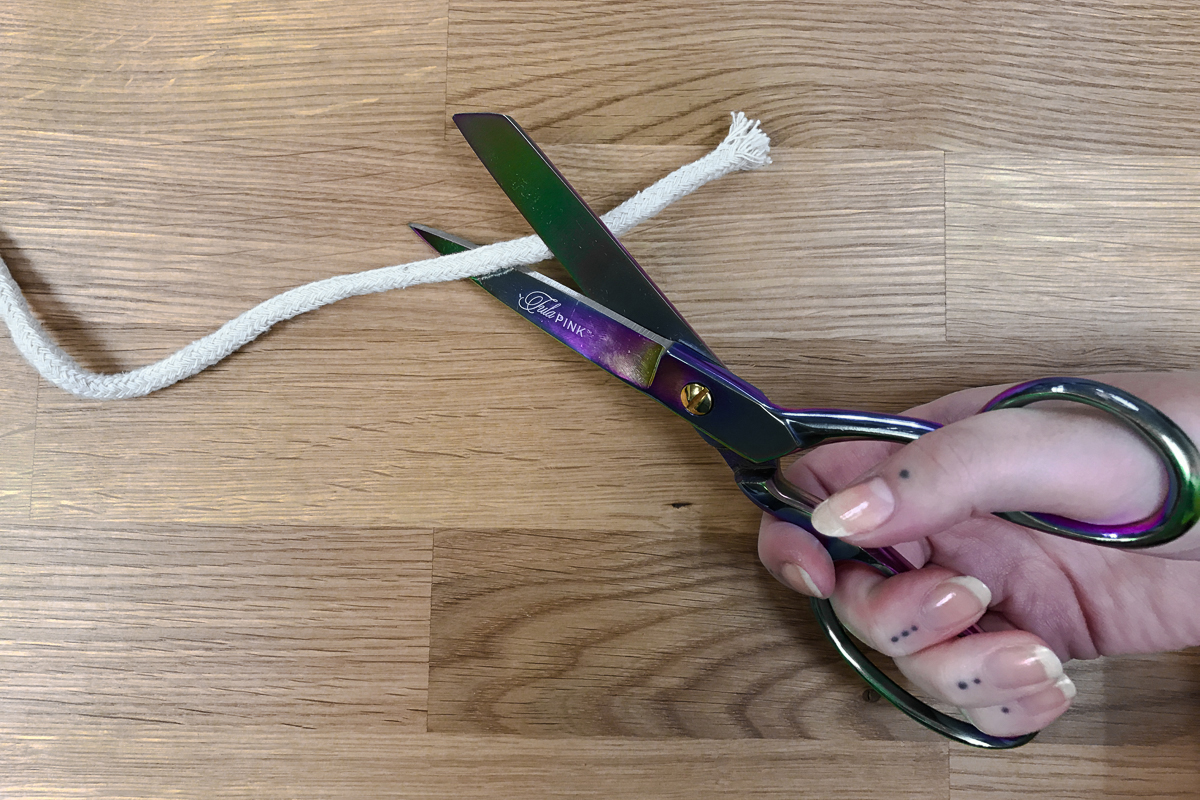
Step 1. Start fresh
I like to clip a clean end to the start of my cord. I find it helps coil more neatly when we’re starting out!
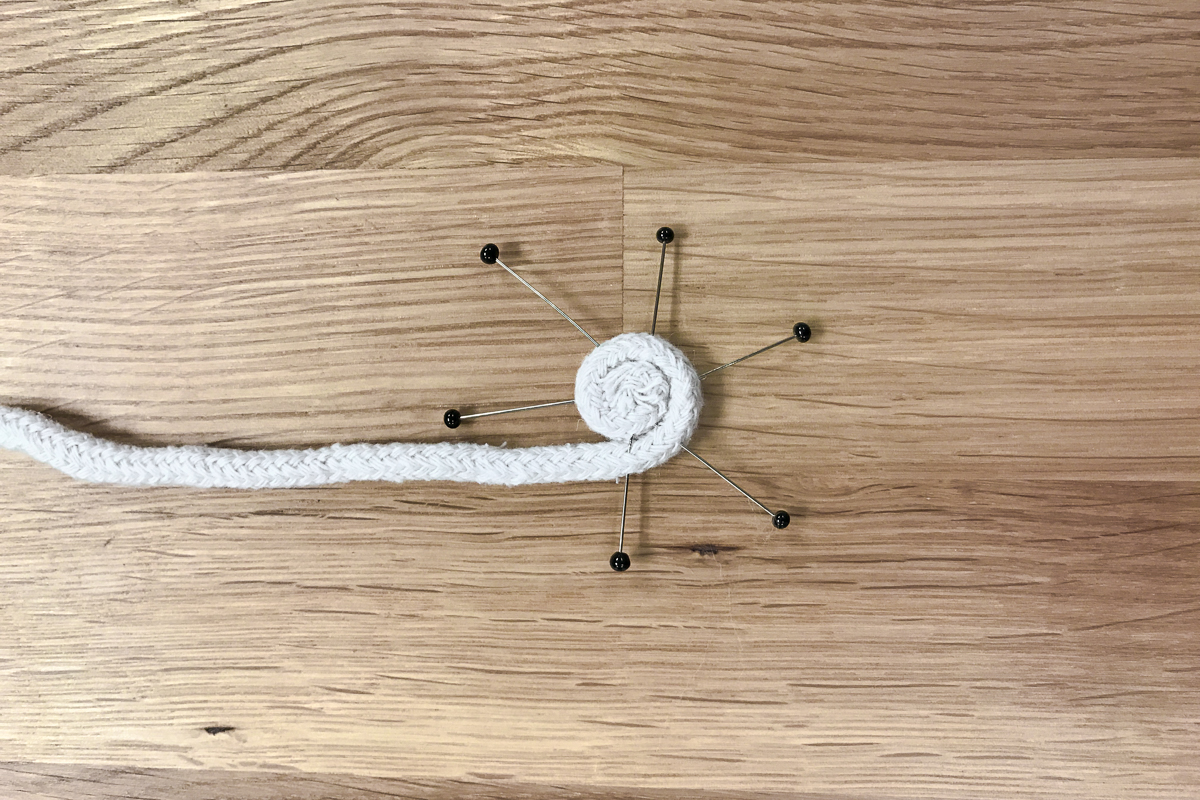
Step 2. Coil & pin
Begin coiling your cord and pin the first couple rotations in place. Wrap until the coil is about 1” in diameter and pin in place.
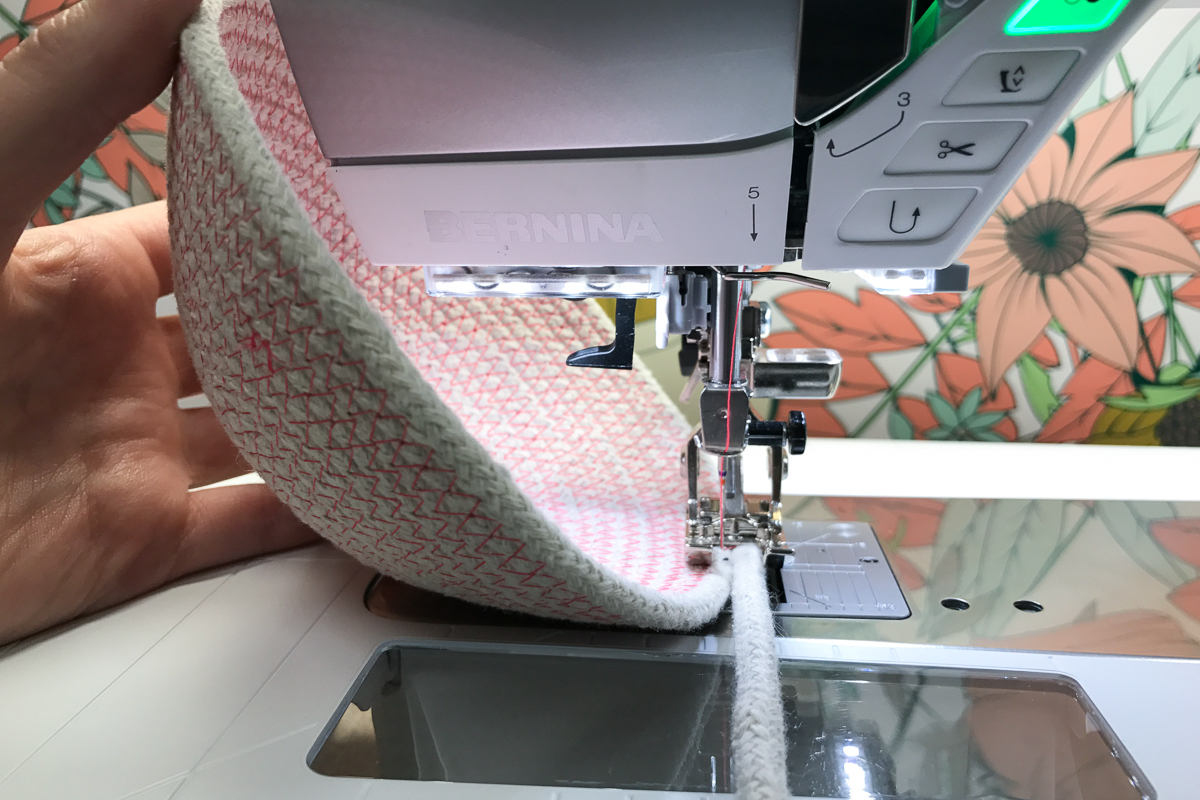
Step 3. Set up your stitch
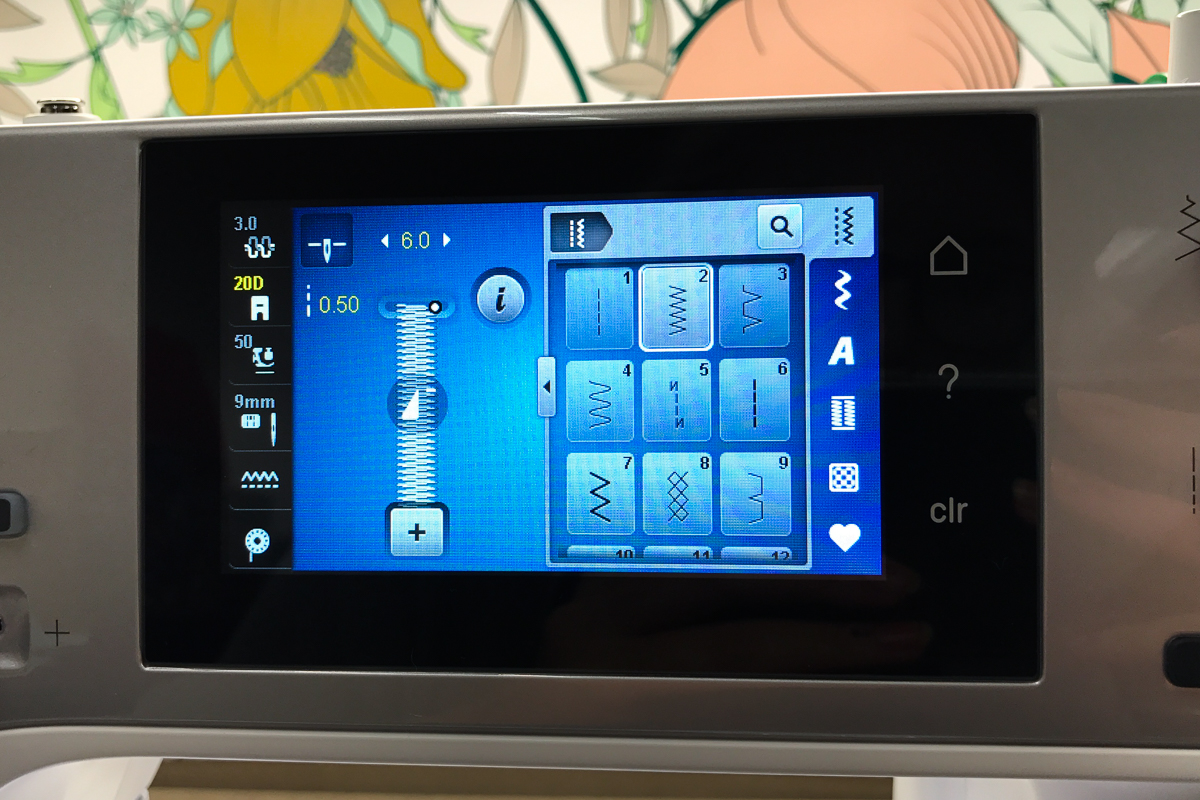
Set your machine to stitch a standard zigzag at about 6mm width. This is wide enough to make sure you’re catching both sides of the cord as you sew—no one wants holes in their rope bowl! Be sure to set your machine to stop with the needle down.
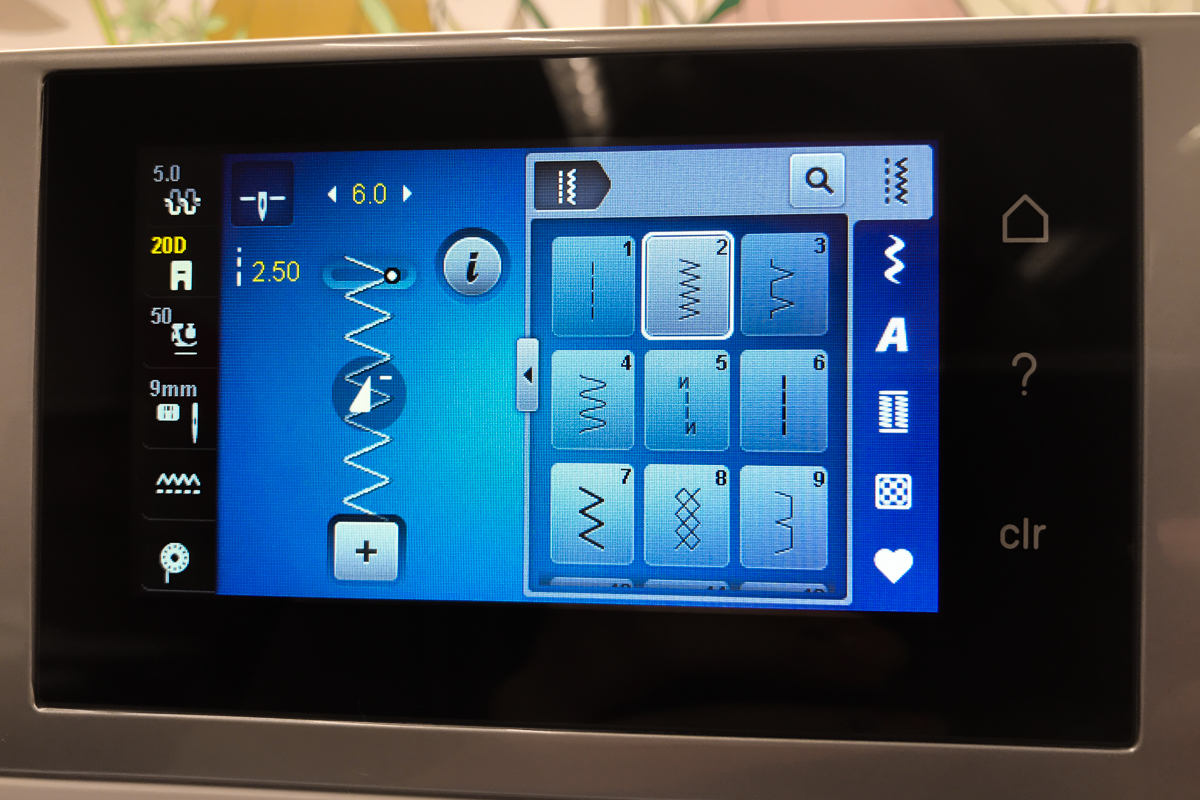
I keep my stitch length at about 2.5mm. You can play with the length of the stitch to create different effects and textures!
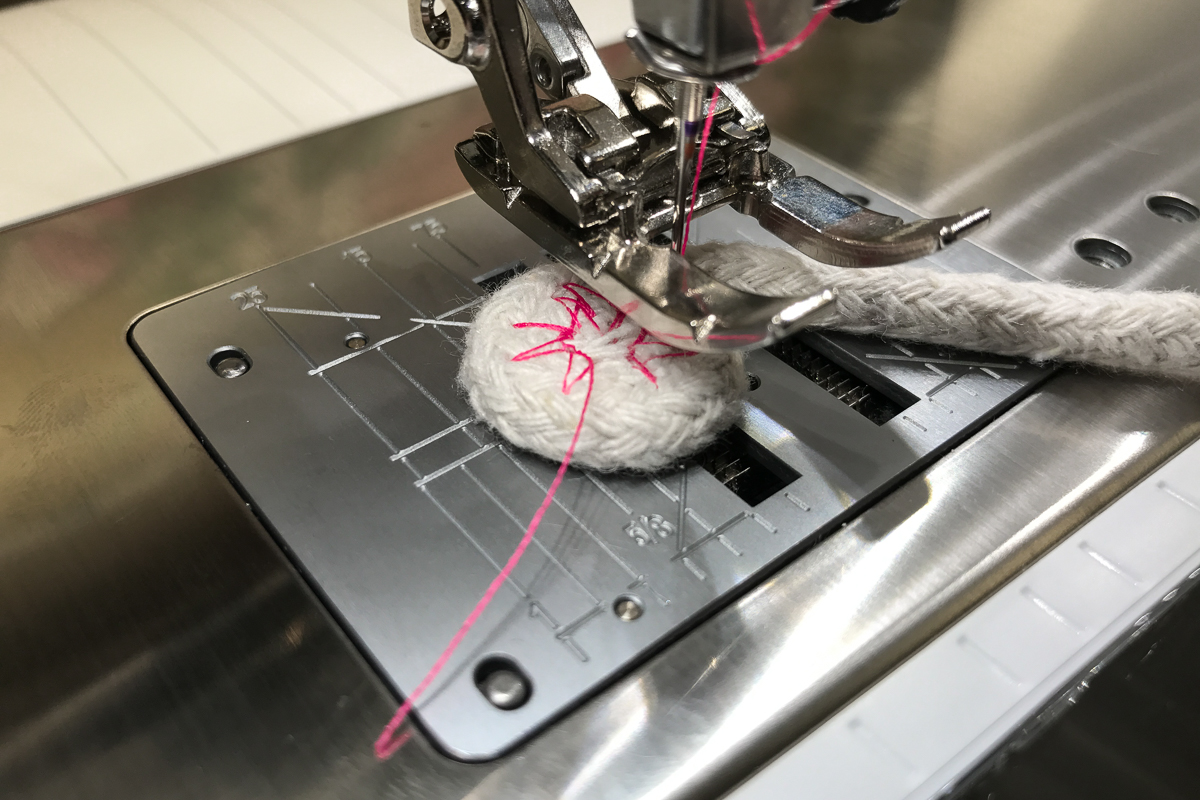
Step 4. Lock the center
Place your coil under the #20D foot. Take the first few stitches very slowly to make sure you sew through the cord with every stitch. Stop and rotate the coil after every stitch or two to work your way around. Make sure not to sew over your pins!

When pivoting, stop with your needle down on the left side, or anchored toward the center of the coil rather than in the length of cord. This helps keep your stitches even and the tension on the cord consistent.
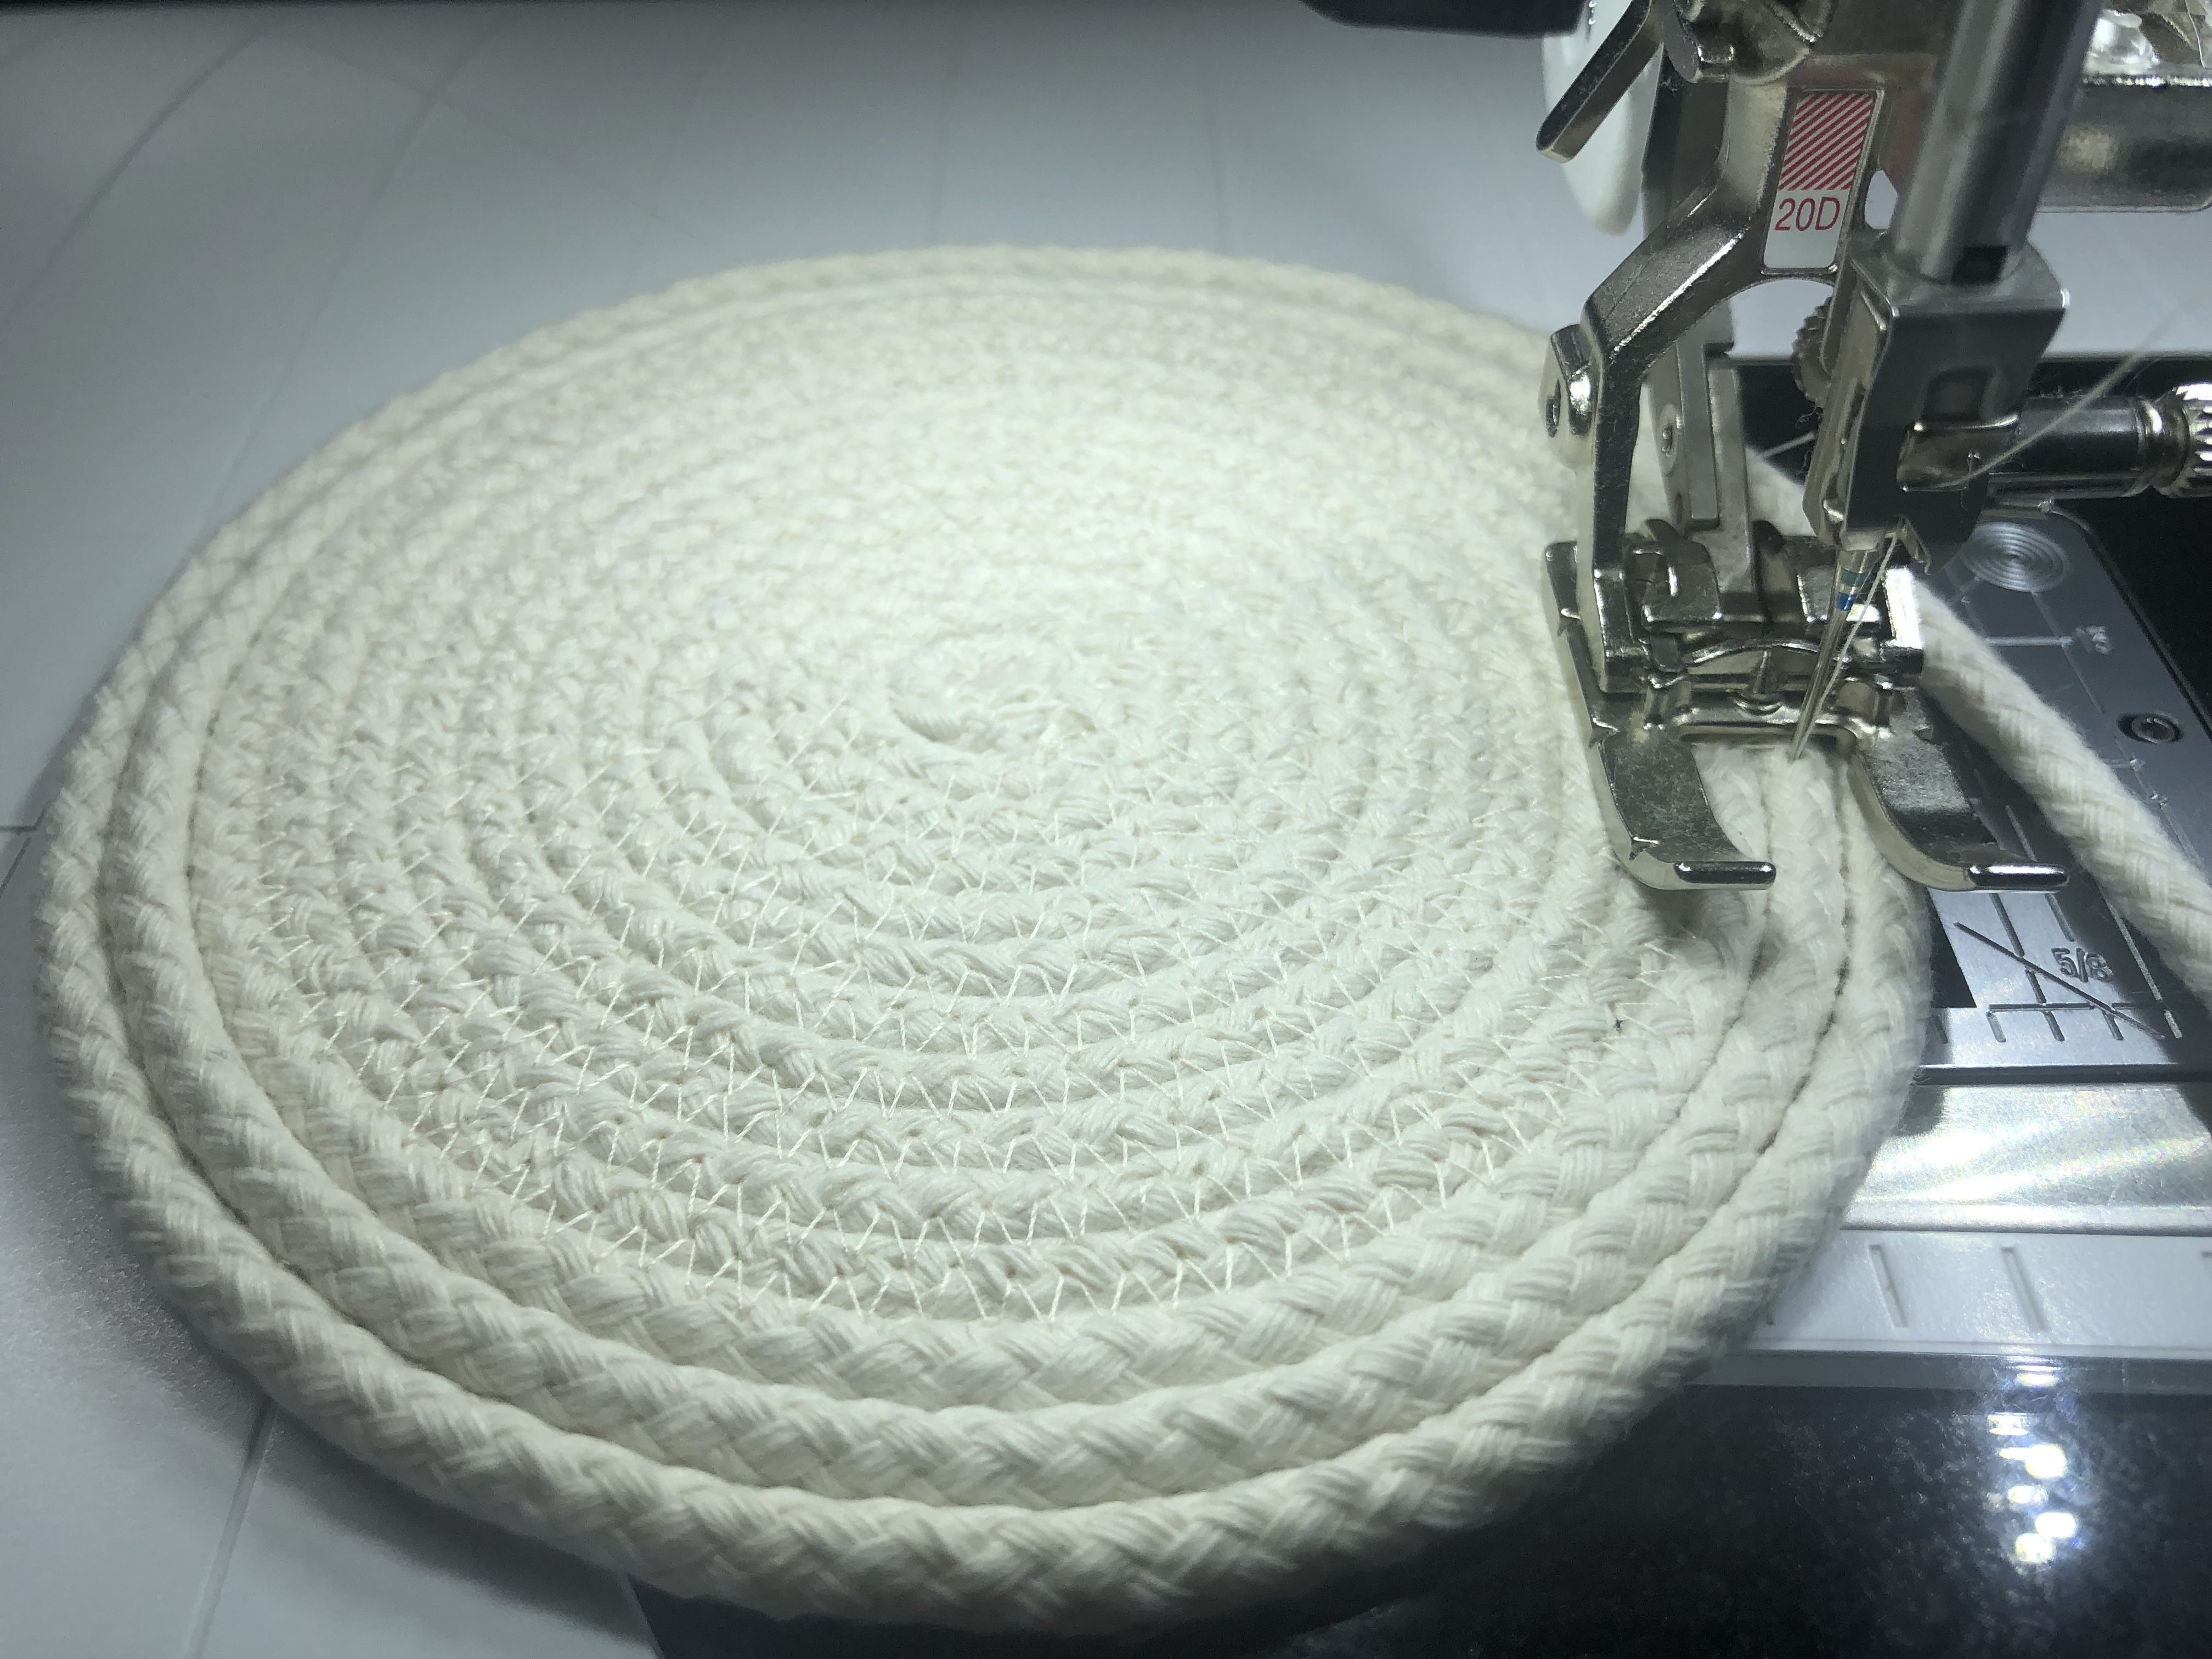
Step 5. Build your base
Once your center is locked in, rotating the bowl will get easier and more consistent. Line up the center where the coil and new cord meet with the center marking on your #20D foot. Move the bowl by gently pulling the base coil toward you from the left side. With dual feed engaged, it will spin with some light pressure.
Slow and steady is the mantra here. If you start sewing too fast, it’s easy to lose track of your placement and end up with holes. It’s hypnotizing after a minute or so!
Step 6. Slope the sides
When you’ve stitched around and around enough to create a base for your bowl, you can start creating an angle to slope the sides of the bowl. Stop stitching, with your needle down as always, and lift the edge of the base up toward your machine head. Continue stitching.
It won’t feel like anything’s happening immediately but after a few turns, you’ll see it start to take shape!
Step 7. Lock the end
After lots of rotations around, you’ll eventually decide your bowl is large enough. To secure the end of your cord, head back to your stitch settings and shorten your zigzag to a tight satin stitch.
Stitch about an inch in the satin stitch and backstitch a couple steps at the very end to keep things extra secure.
Step 8. Tie it off
Pull your bowl away from the sewing machine. Make a small knot in the cord as close to your satin stitching as possible. Cut off the excess cord, fray the raw edge, and you’re done!
Supply List to Machine Embroider a Rope Bowl
- 7/32″ or 1/4″ Cotton Clothesline
- 90/14 Topstitch needle
- #20D Open Toe Embroidery Foot
- #26 Drop Shape Embroidery Foot
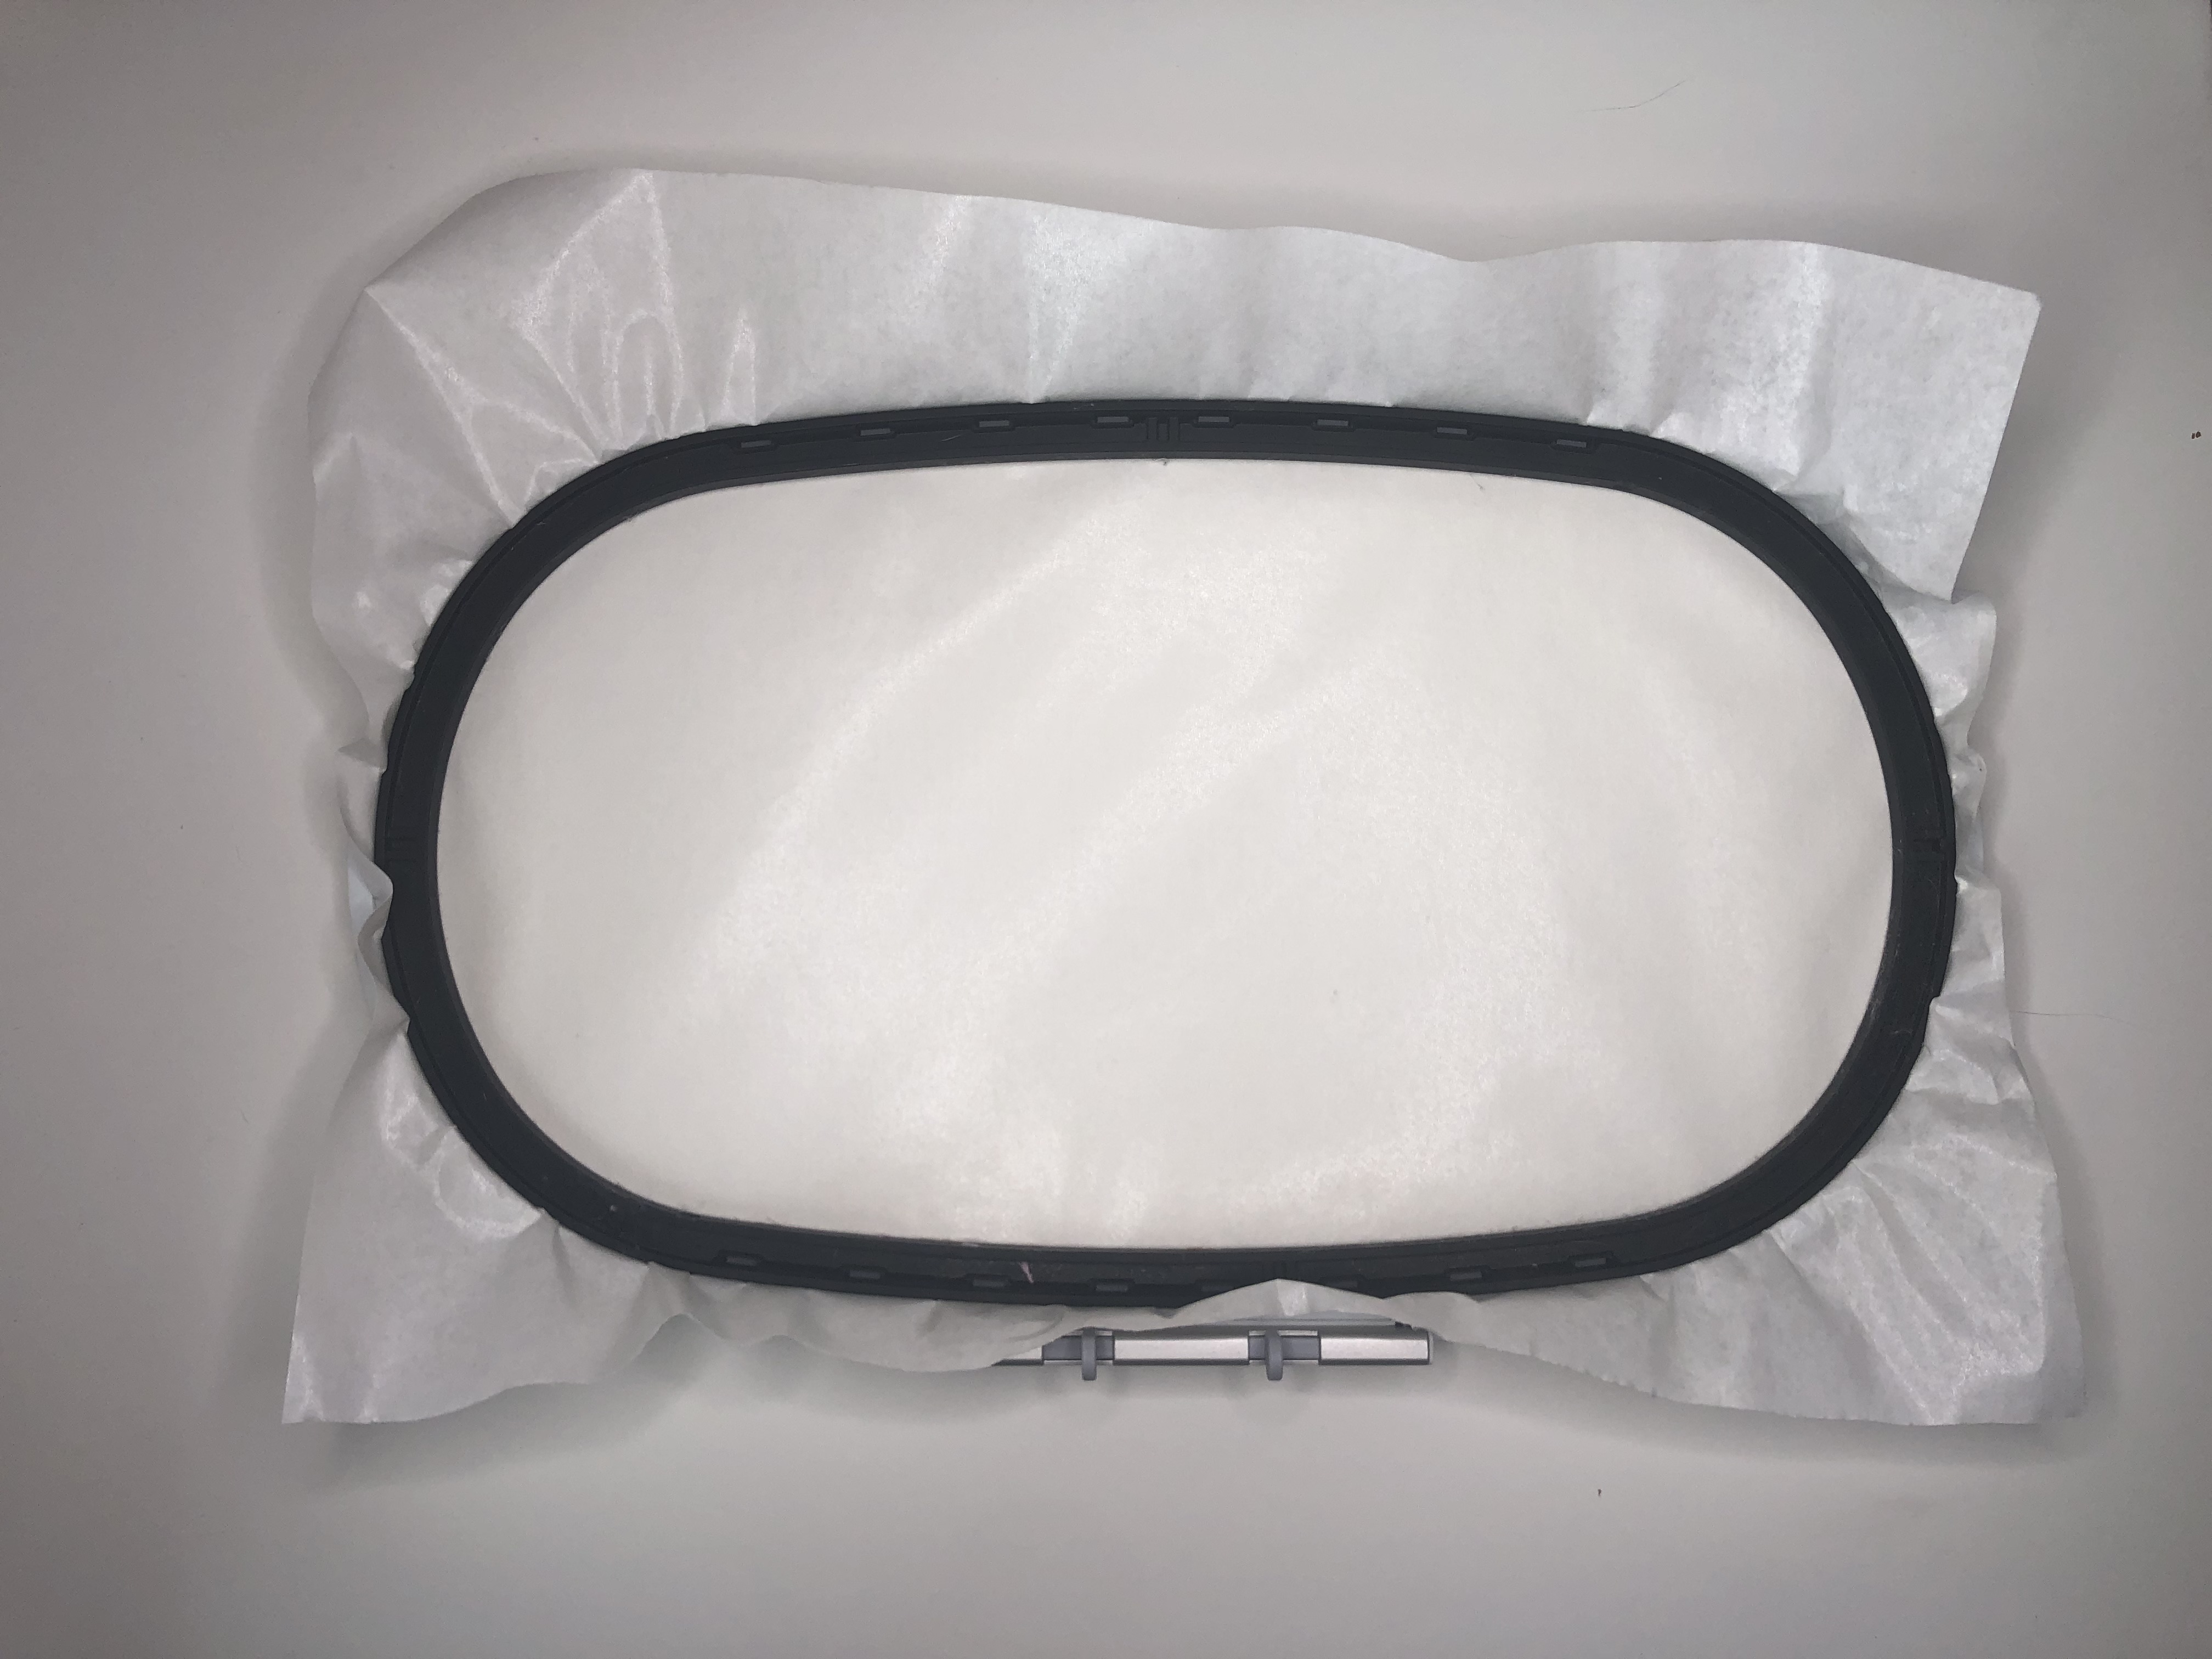
- Maxi Hoop
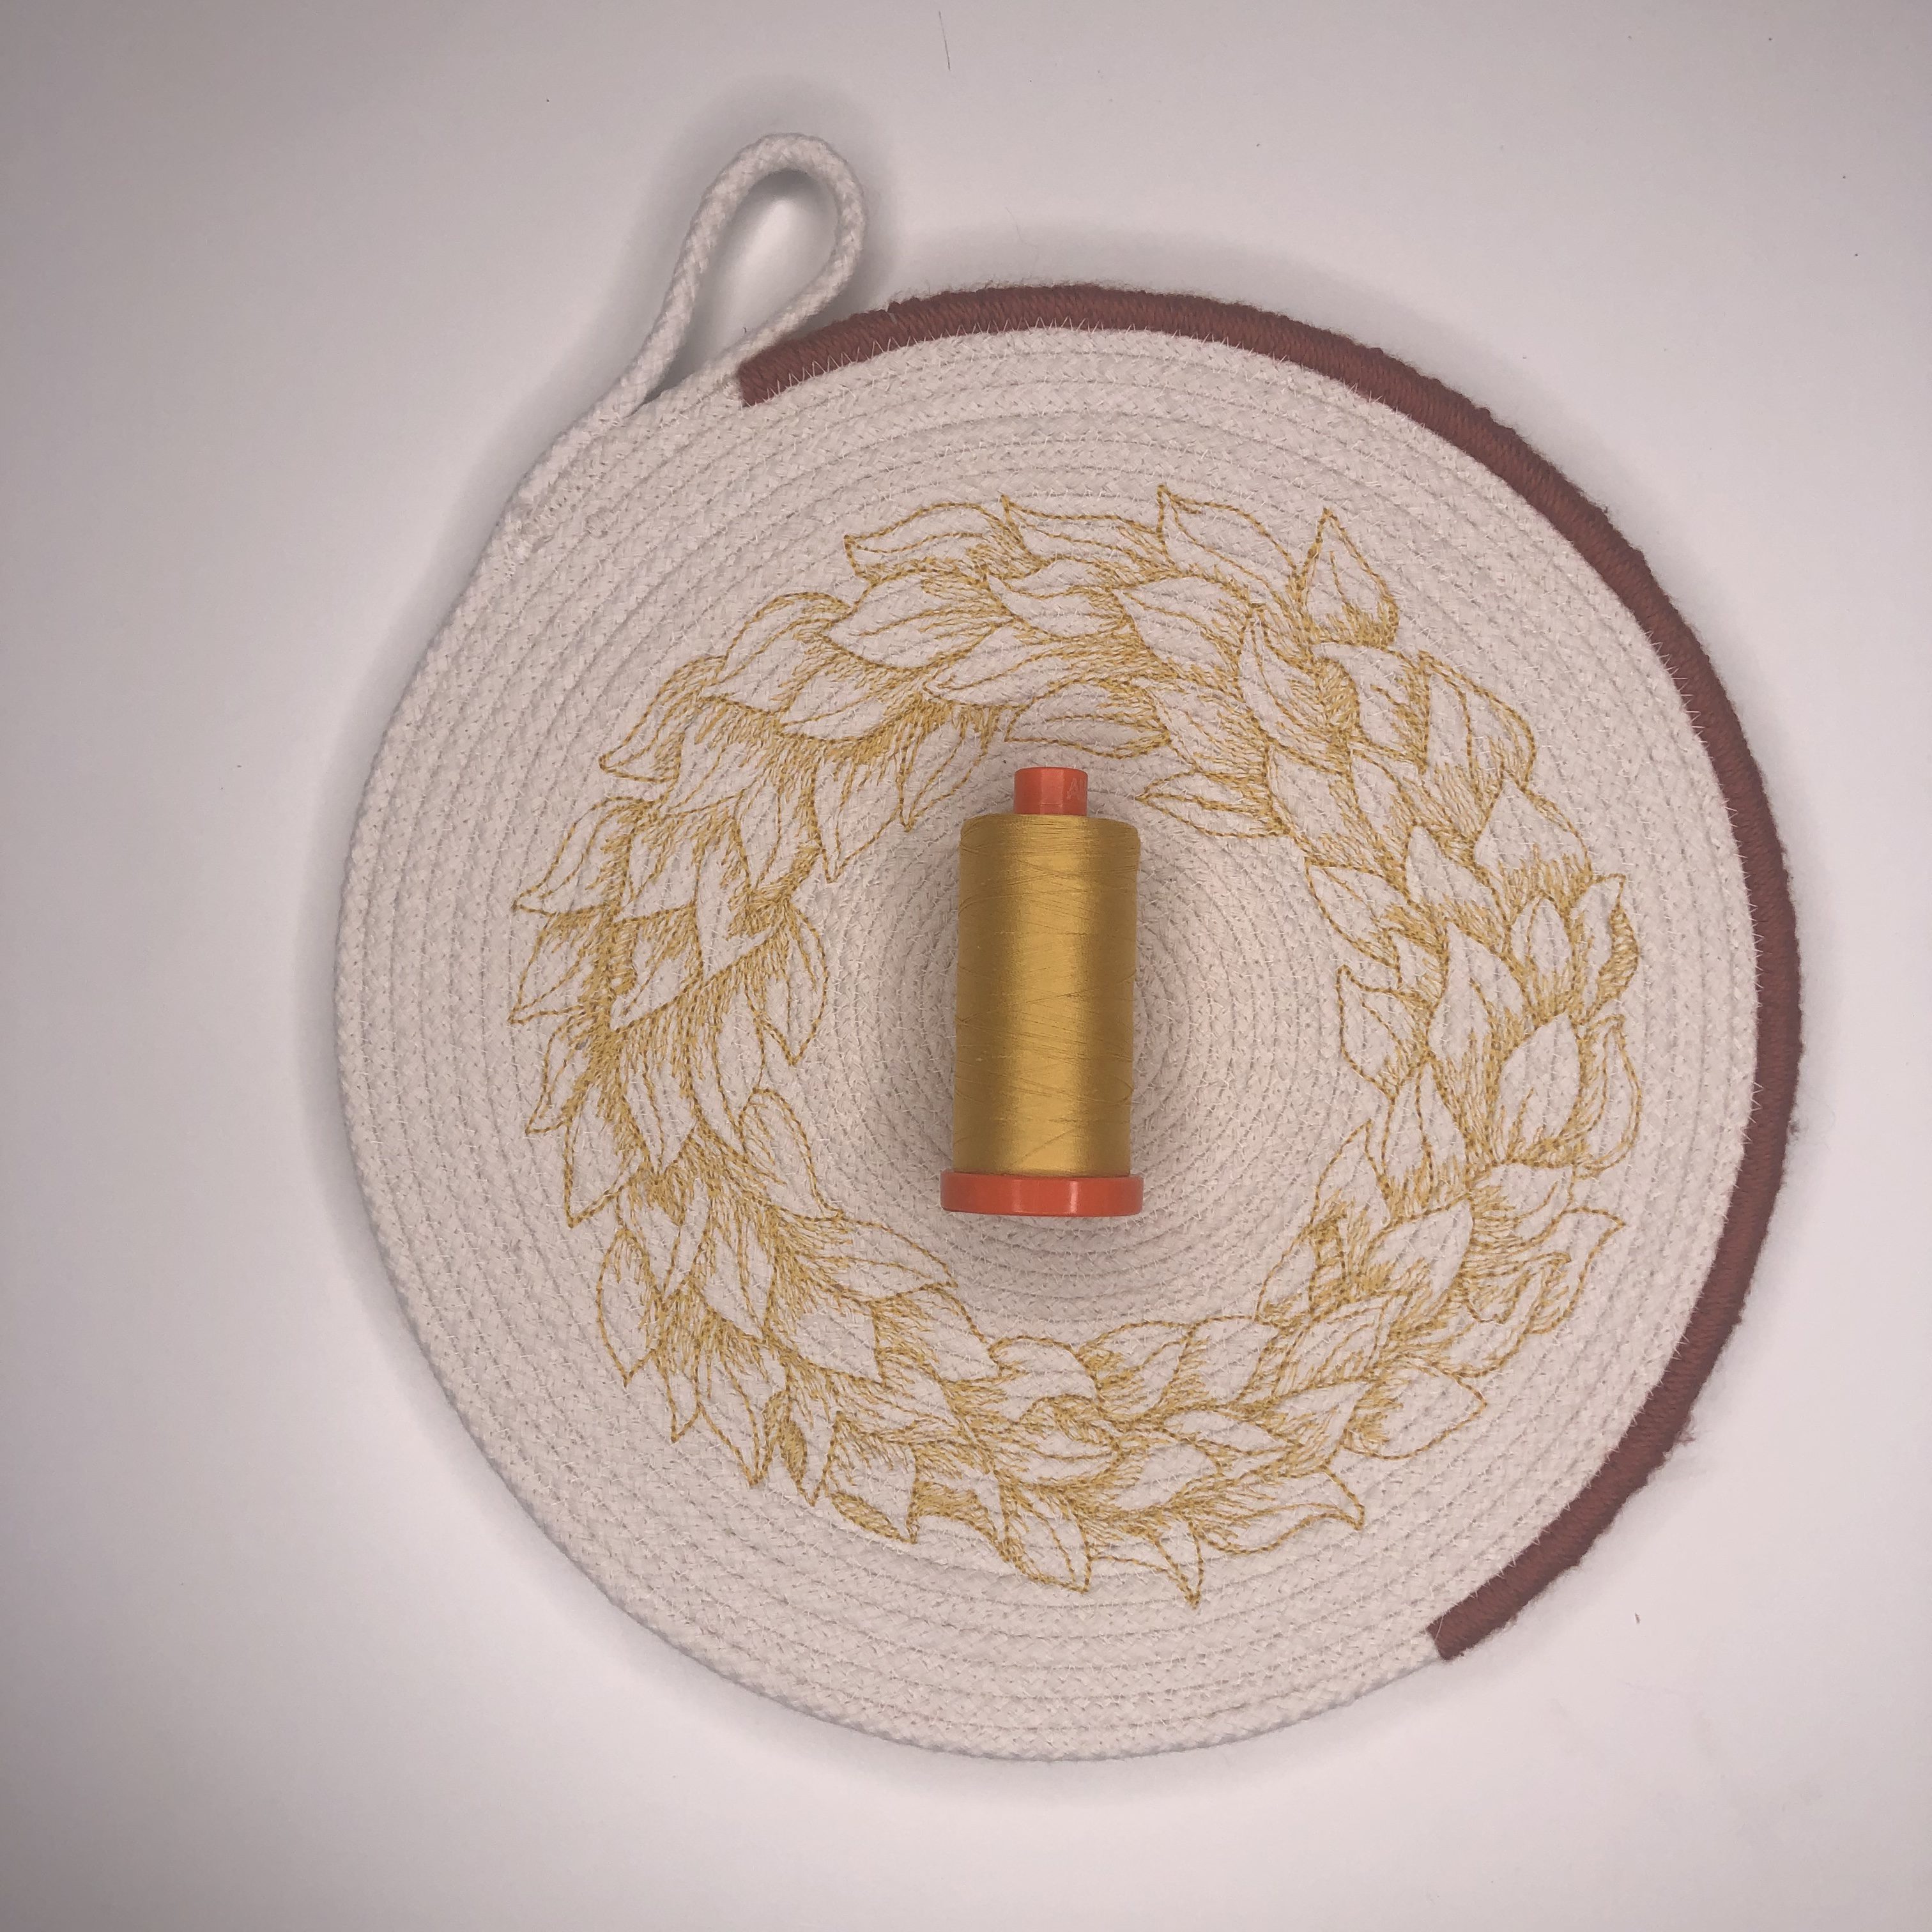
- 50 Weight Aurifil Thread
- 2311 for bowl assembly
- 2130 for embroidery design
- Marking Tool
- Straight pins or Wonderclips
- OESD Bobbin Thread
- OESD Ultra Clean and Tear Plus
- OESD “Wreath Linework” embroidery design
- Optional: Yarn to wrap the cord
- Mine is a sport weight cotton, left over from a knitting project.
How to Embroider a Rope Bowl
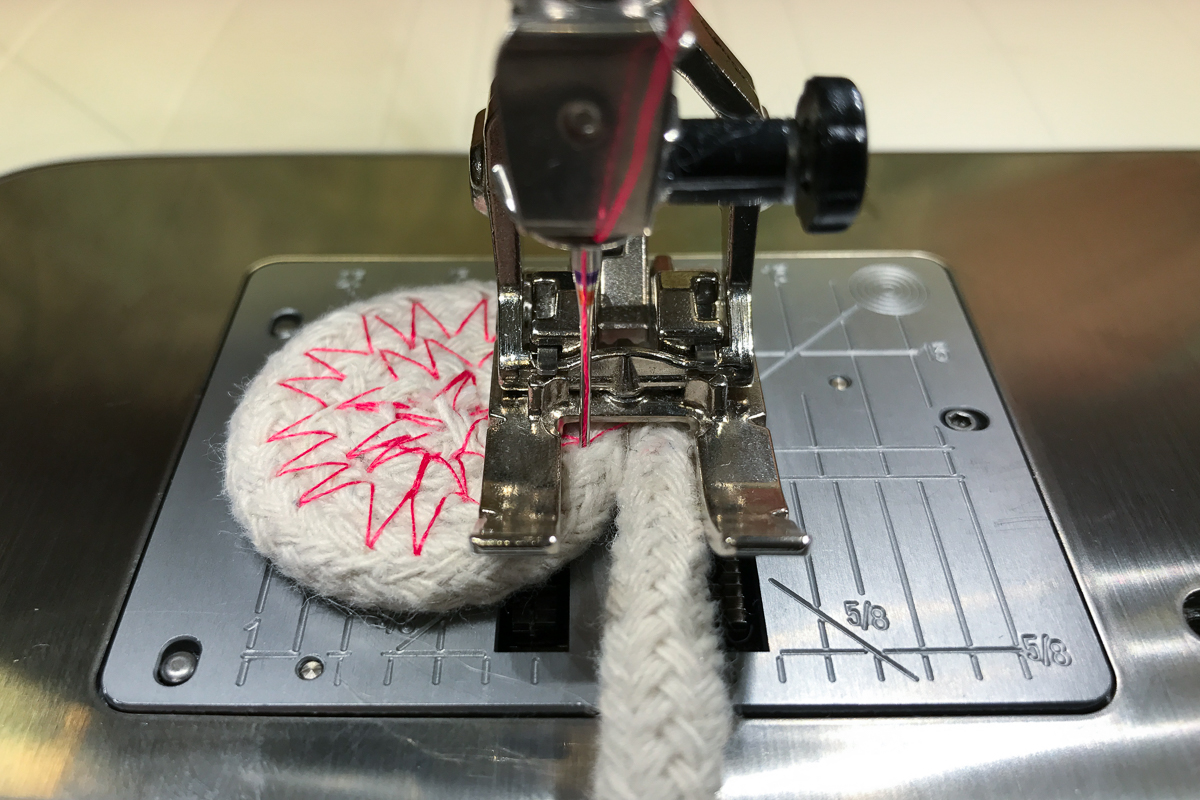
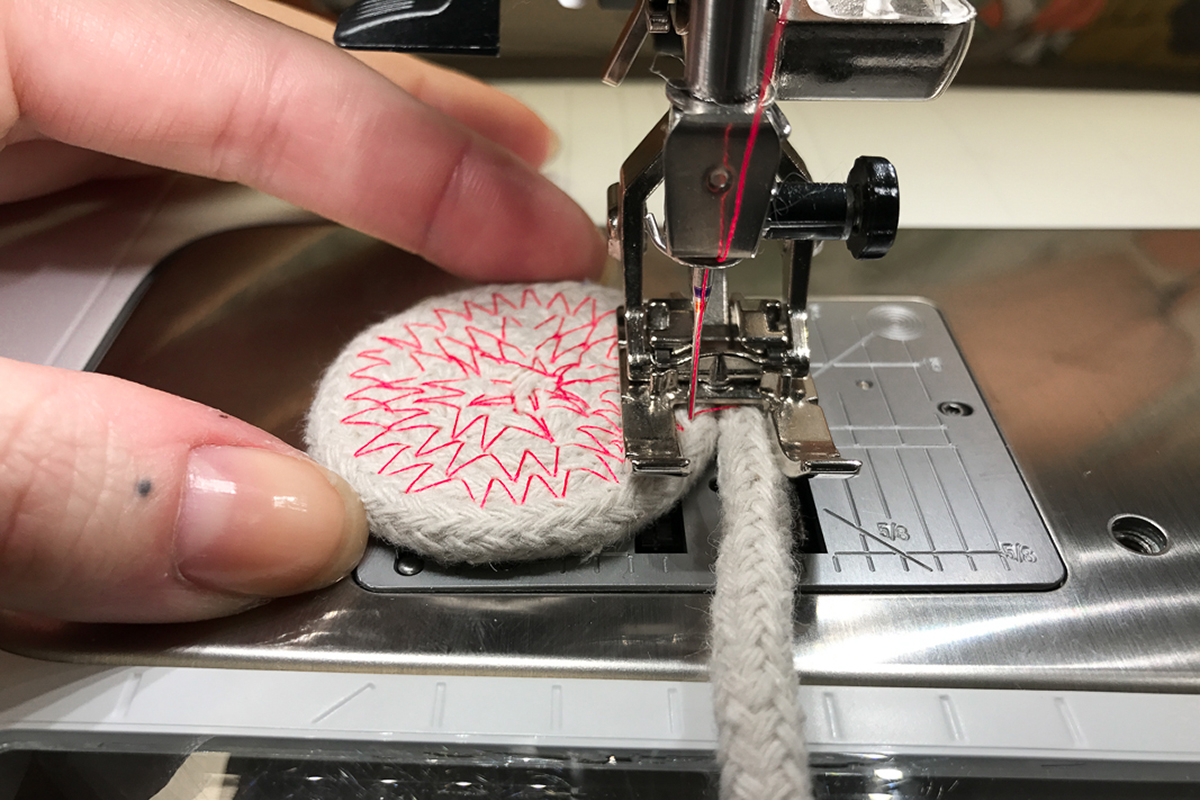
We are going to start off on the sewing side of the machine. Install a 90/14 Topstitch needle and a #20D Open Toe Embroidery Foot.
Start sewing your bowl base following the Rock a Rope Bowl tutorial. Stop sewing when the diameter of the base fits just inside your embroidery hoop by back stitching (as described in step 7) and cutting your thread. Do not cut the rope! You are going to leave it hanging off the main piece.
For today’s project, I am using a maxi hoop so I stopped at roughly nine inches for the base.
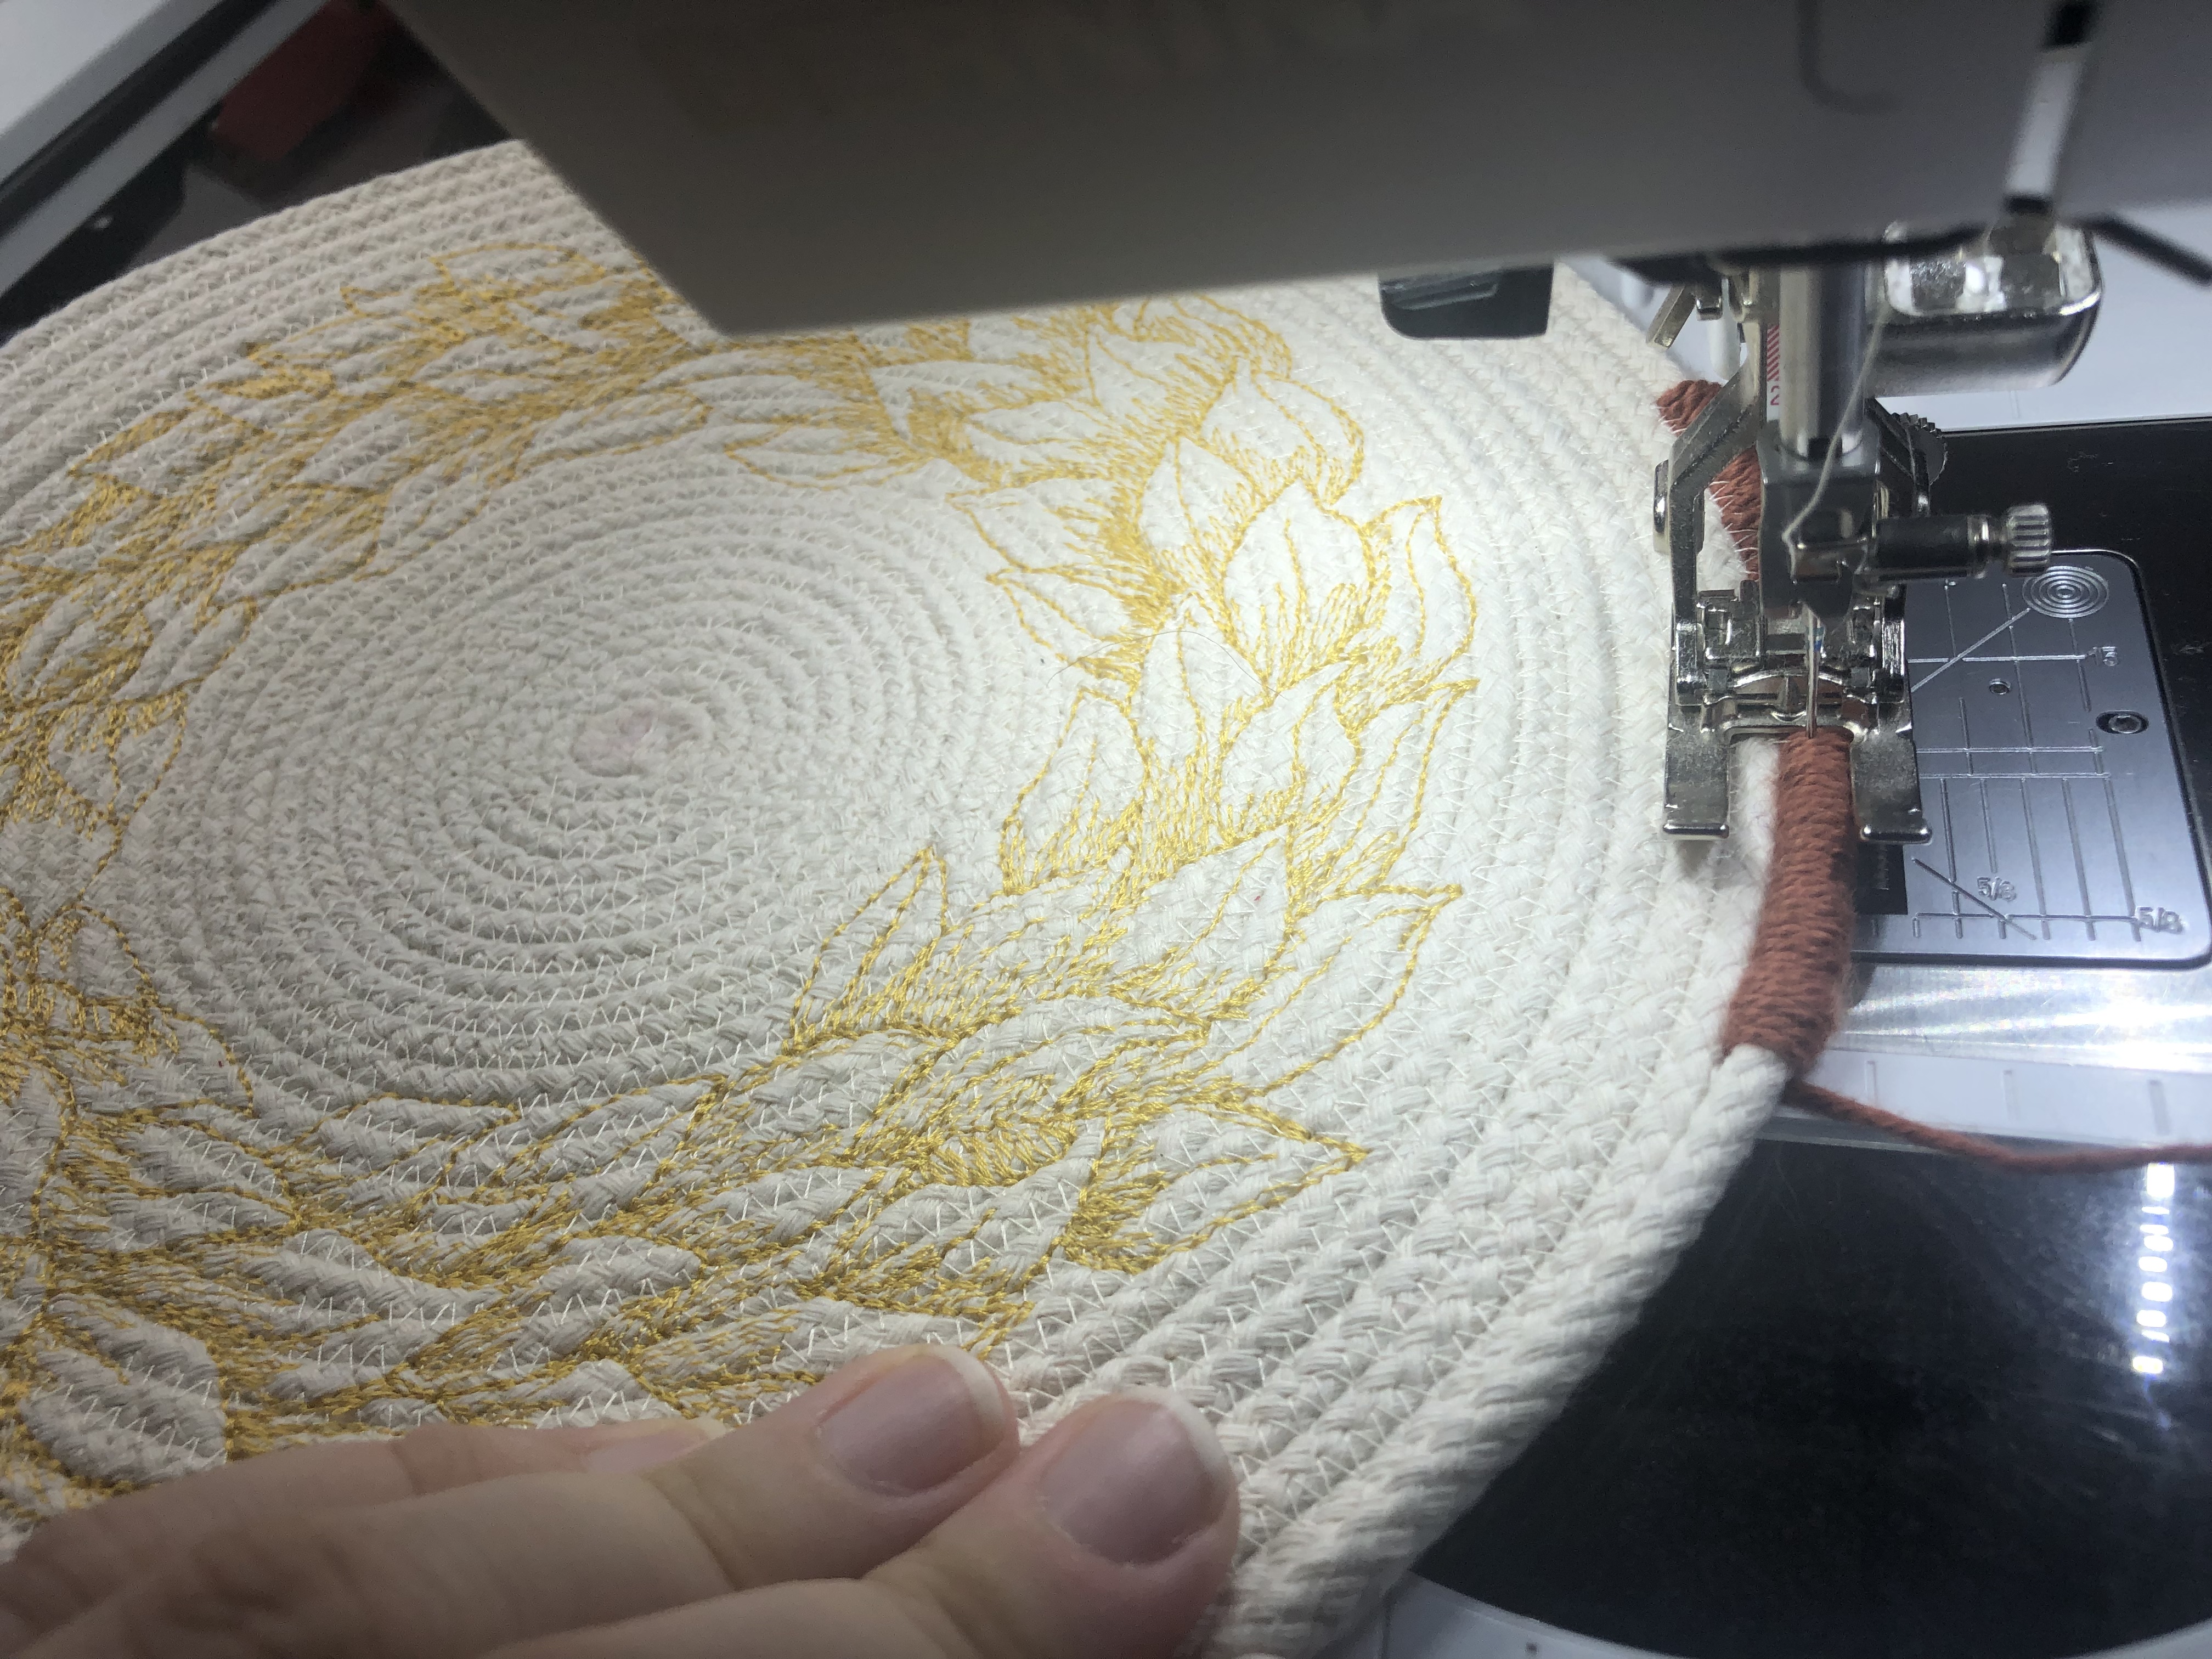
Now that the rope bowl is started let’s prep our machine for embroidery. Put the #26 drop shaped embroidery foot on the machine and switch to white bobbin thread, we will keep using the 94/14 Topstitch needle.
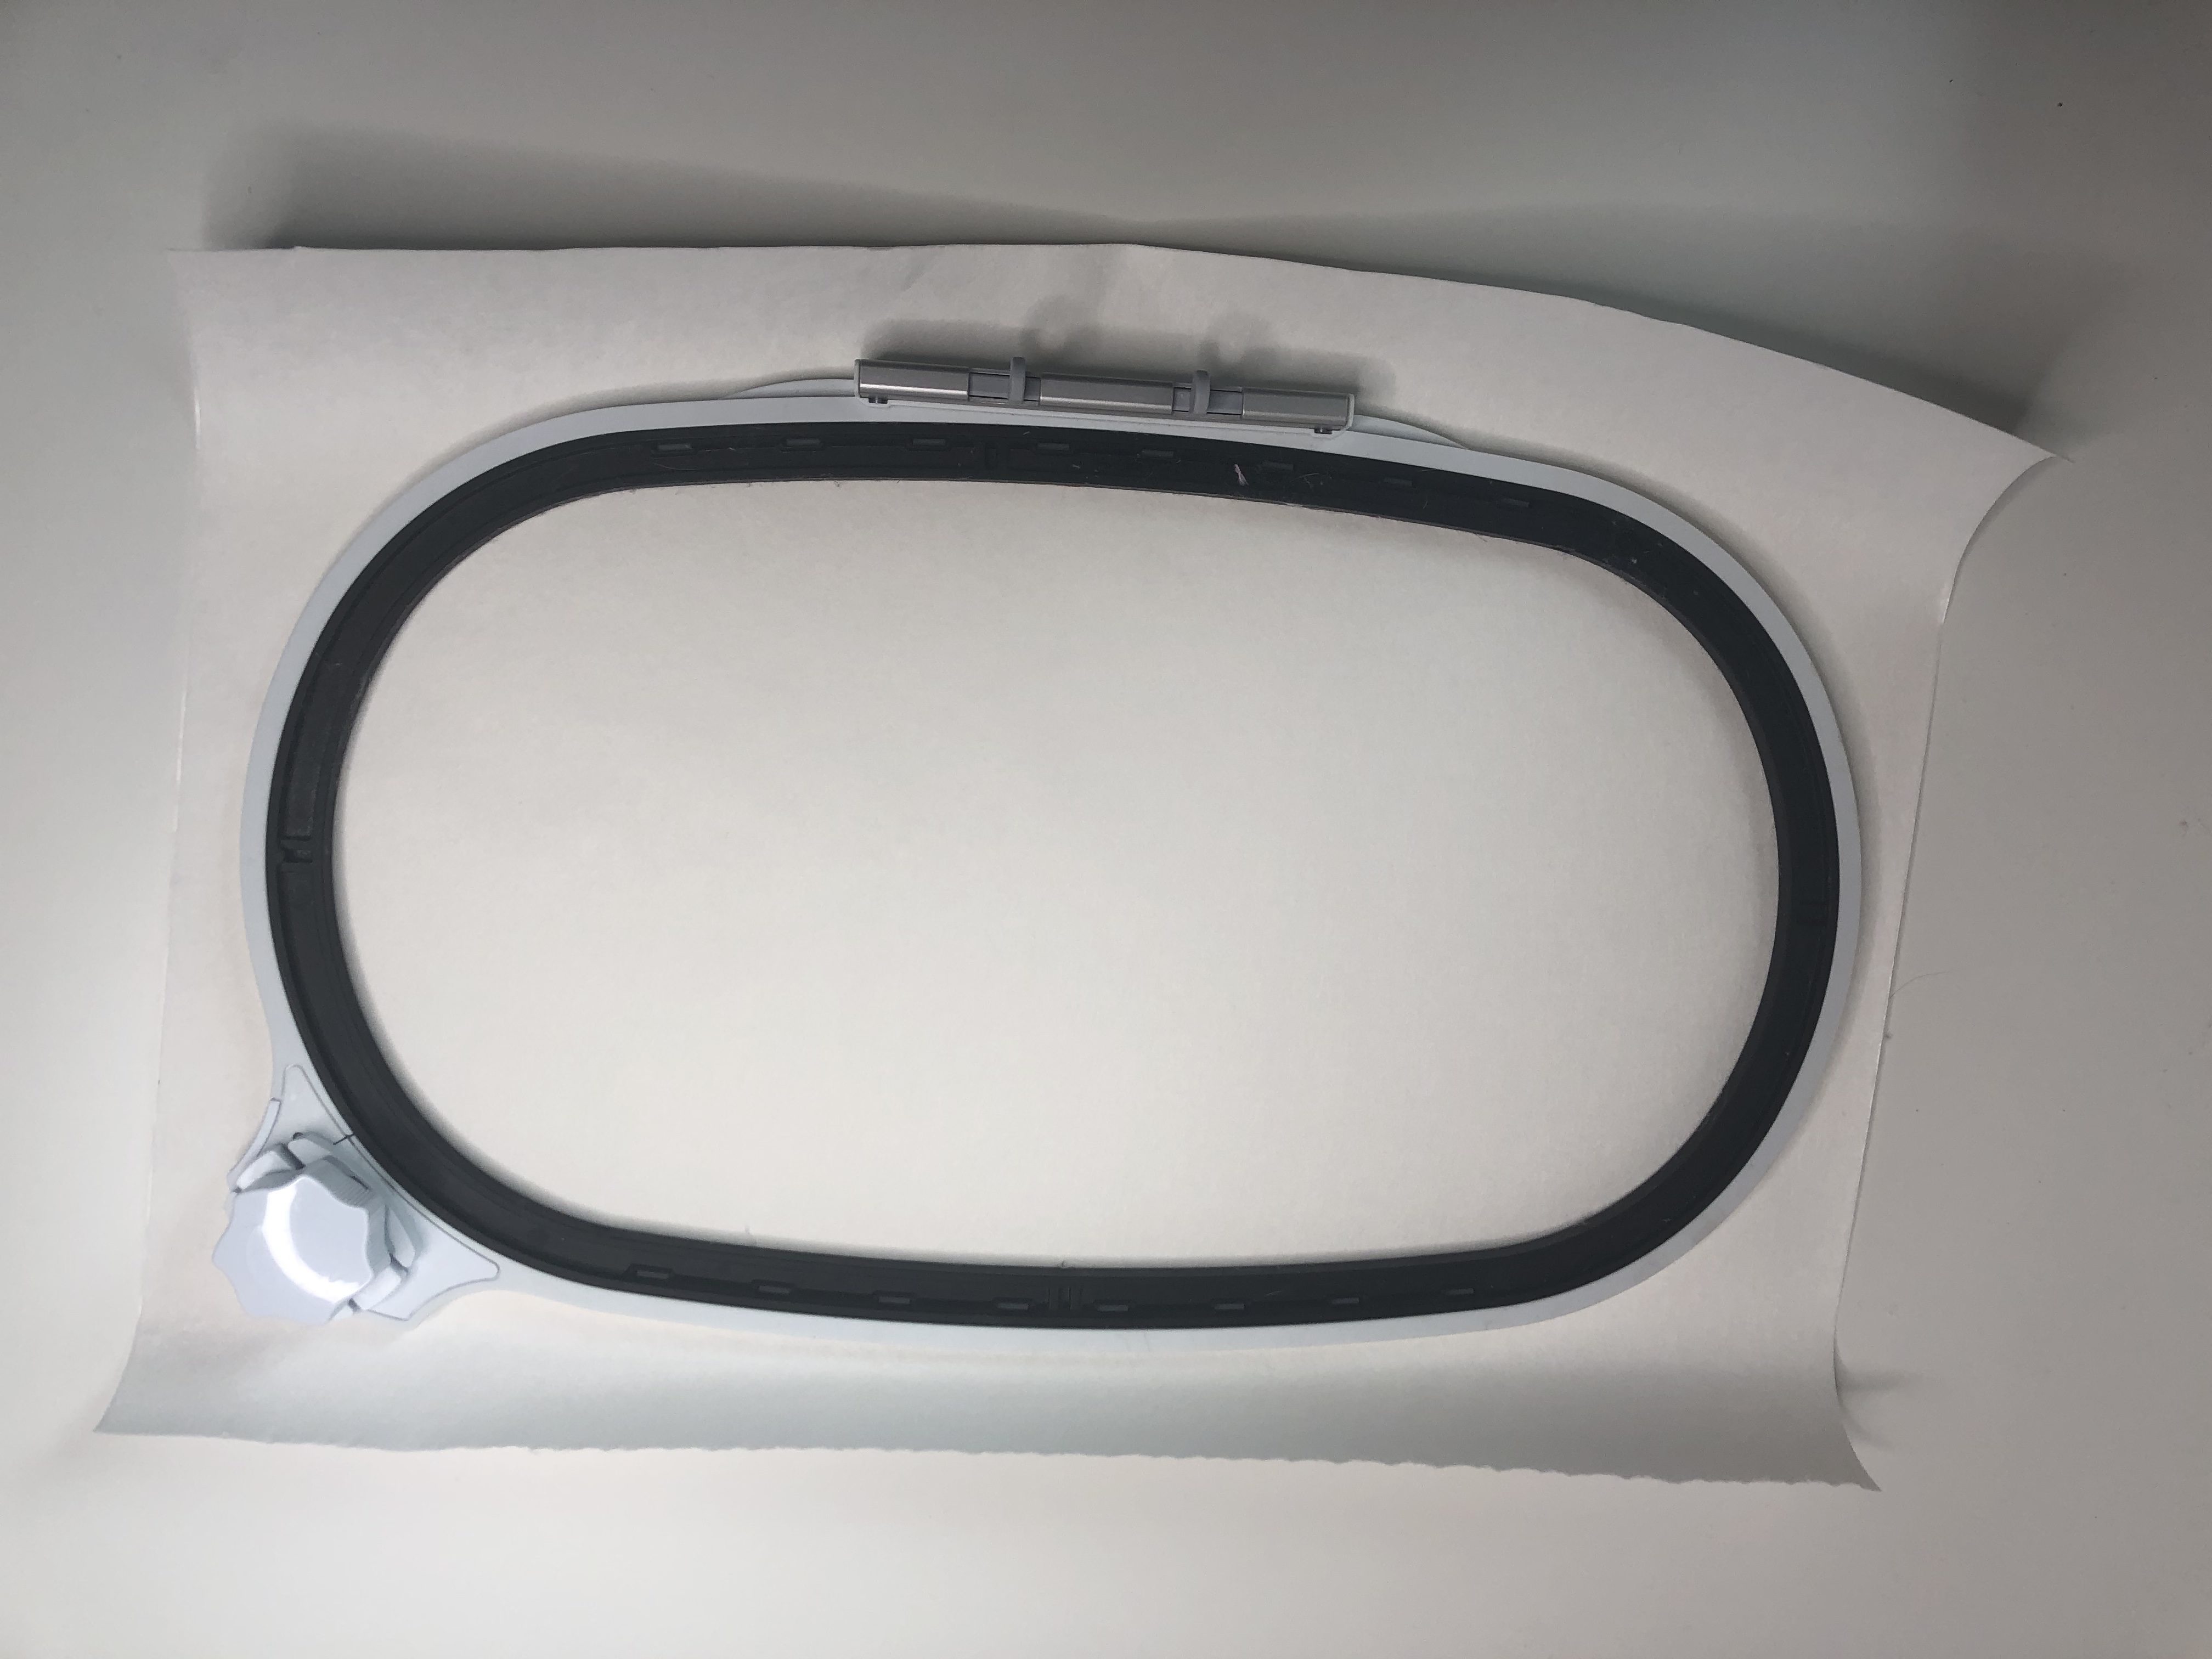
Cut your Ultra Clean and Tear Plus to the size of your hoop (so there is at least 1.5″ bigger then your hoop on all sides). Peel away the backing and set in on your table sticky side up. Place your inner hoop, face-up, in the center of the stabilizer and press it hard.
Hoop your stabilizer by itself.
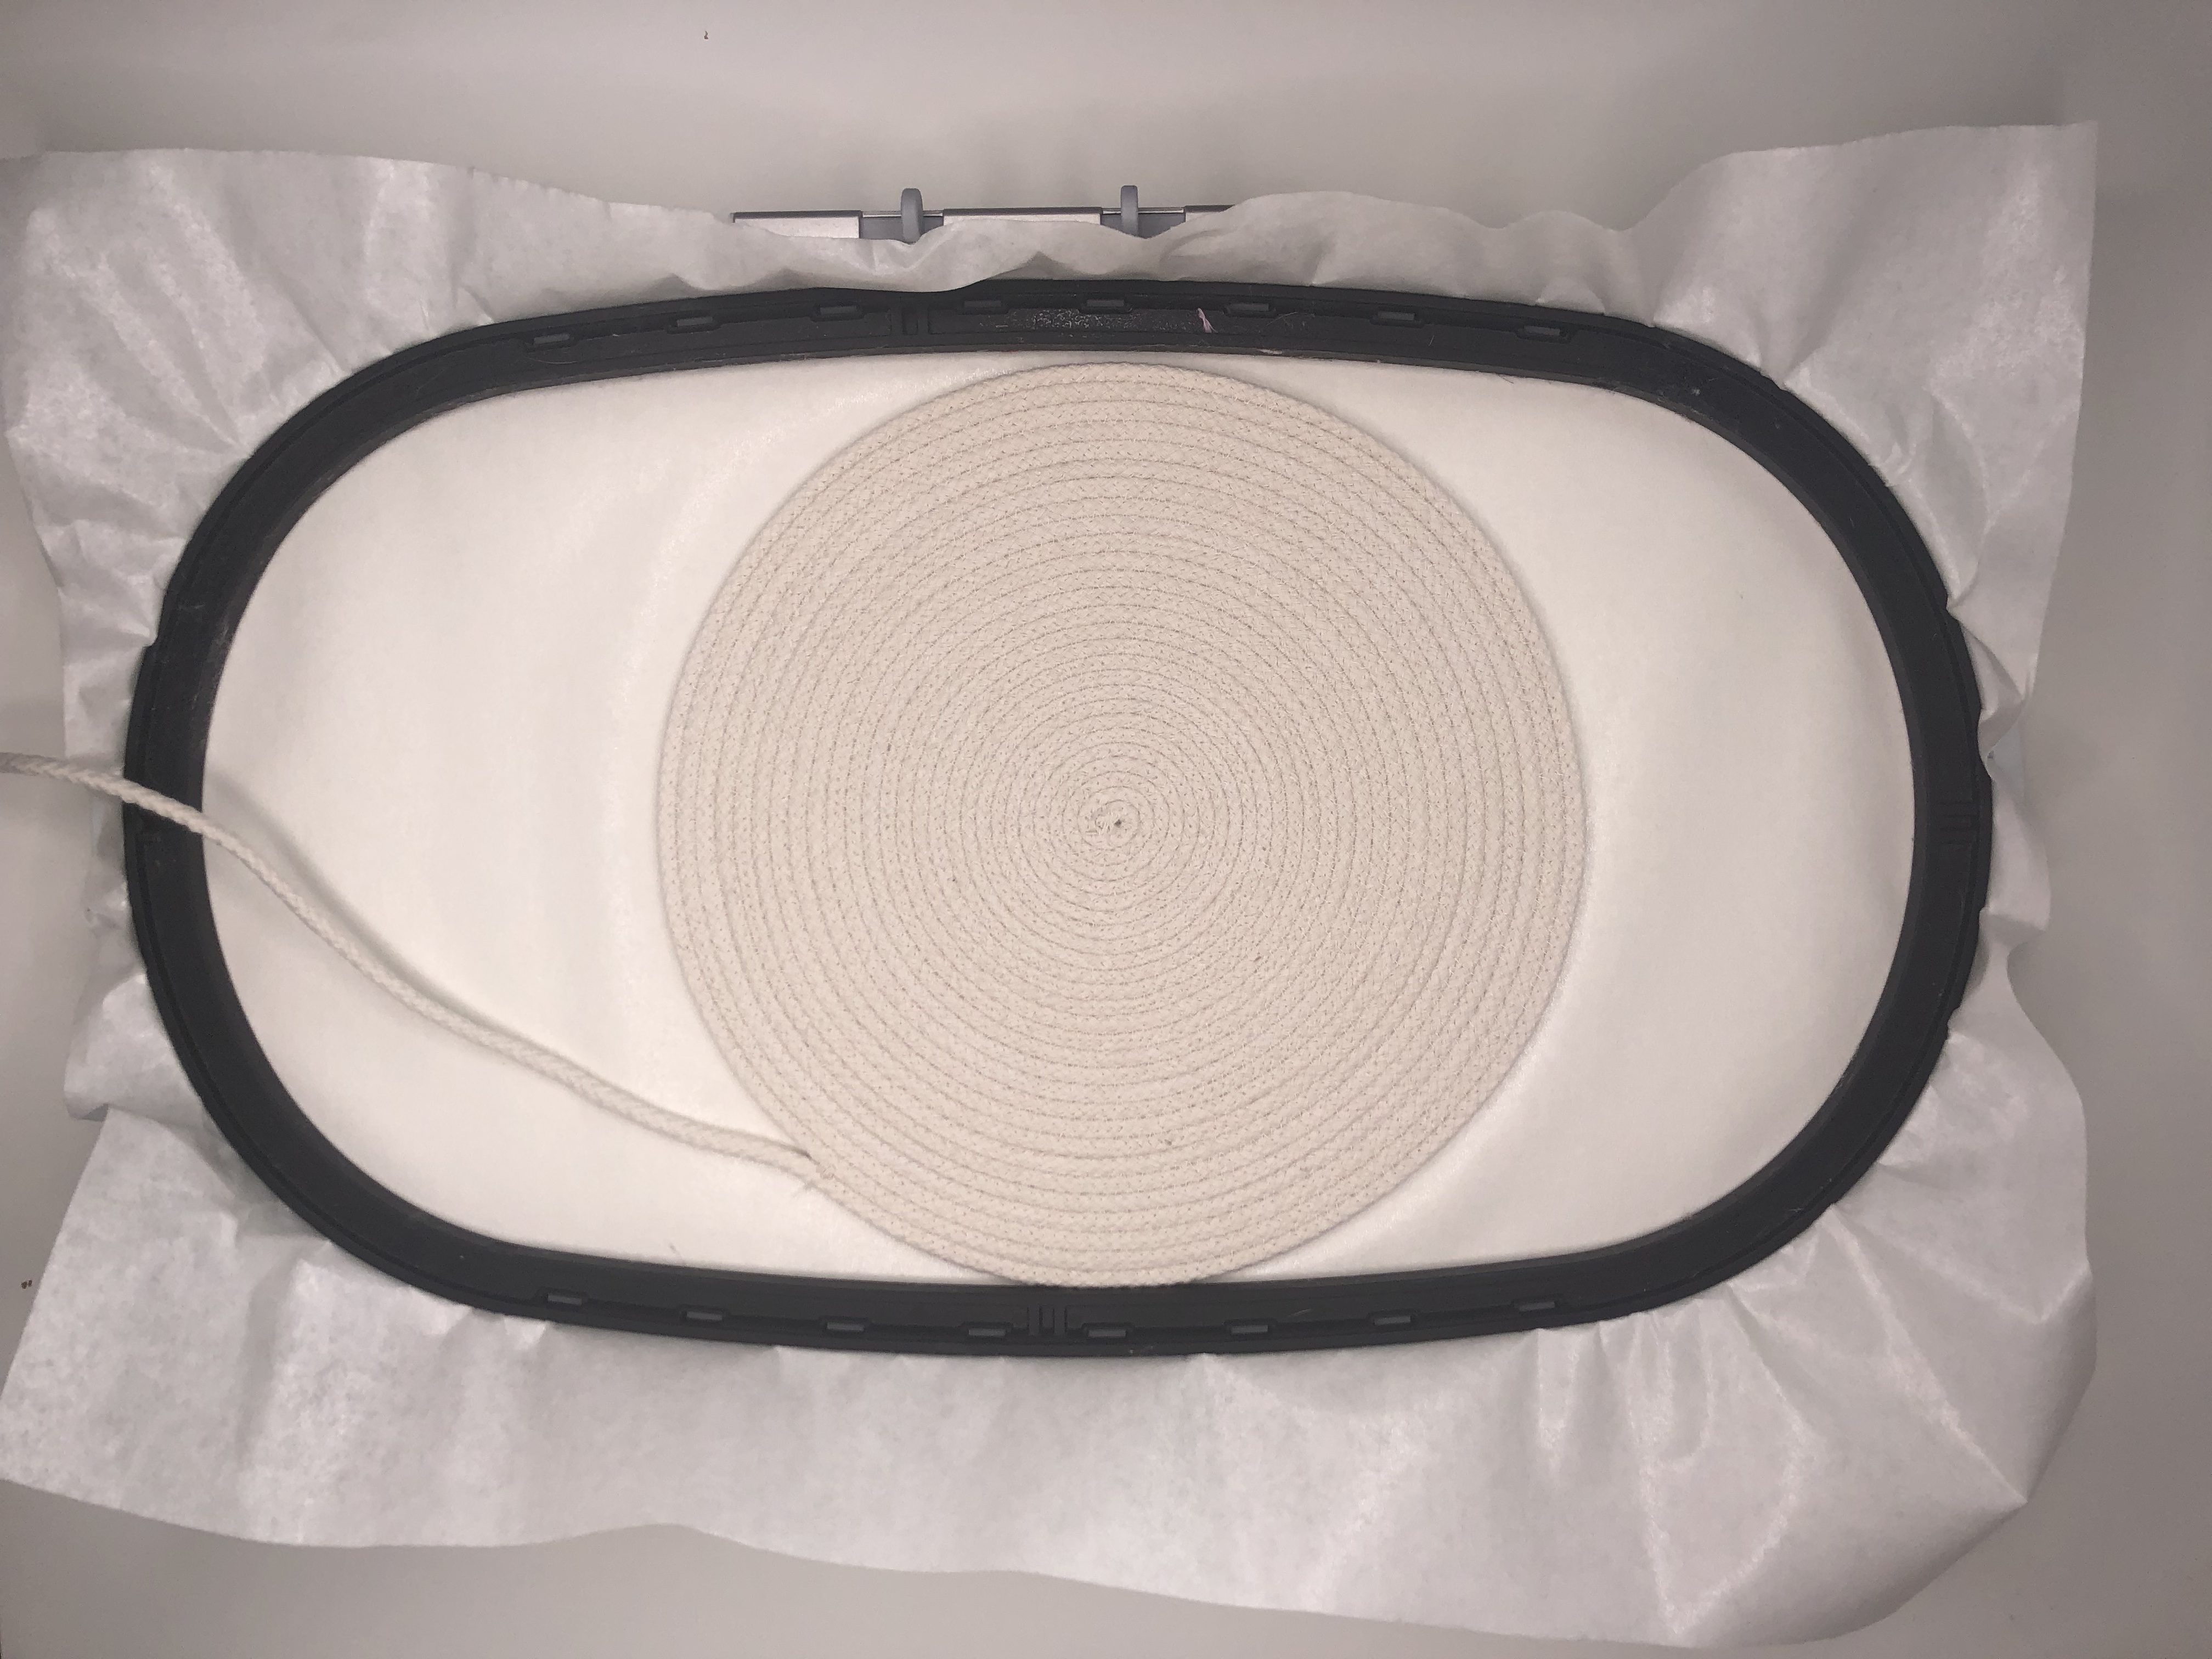
Mark the center of your rope bowl base with your water soluble marker. Place the bowl base in the center of your hoop. Don’t worry about being too perfect, we will use the machine to position it perfectly.
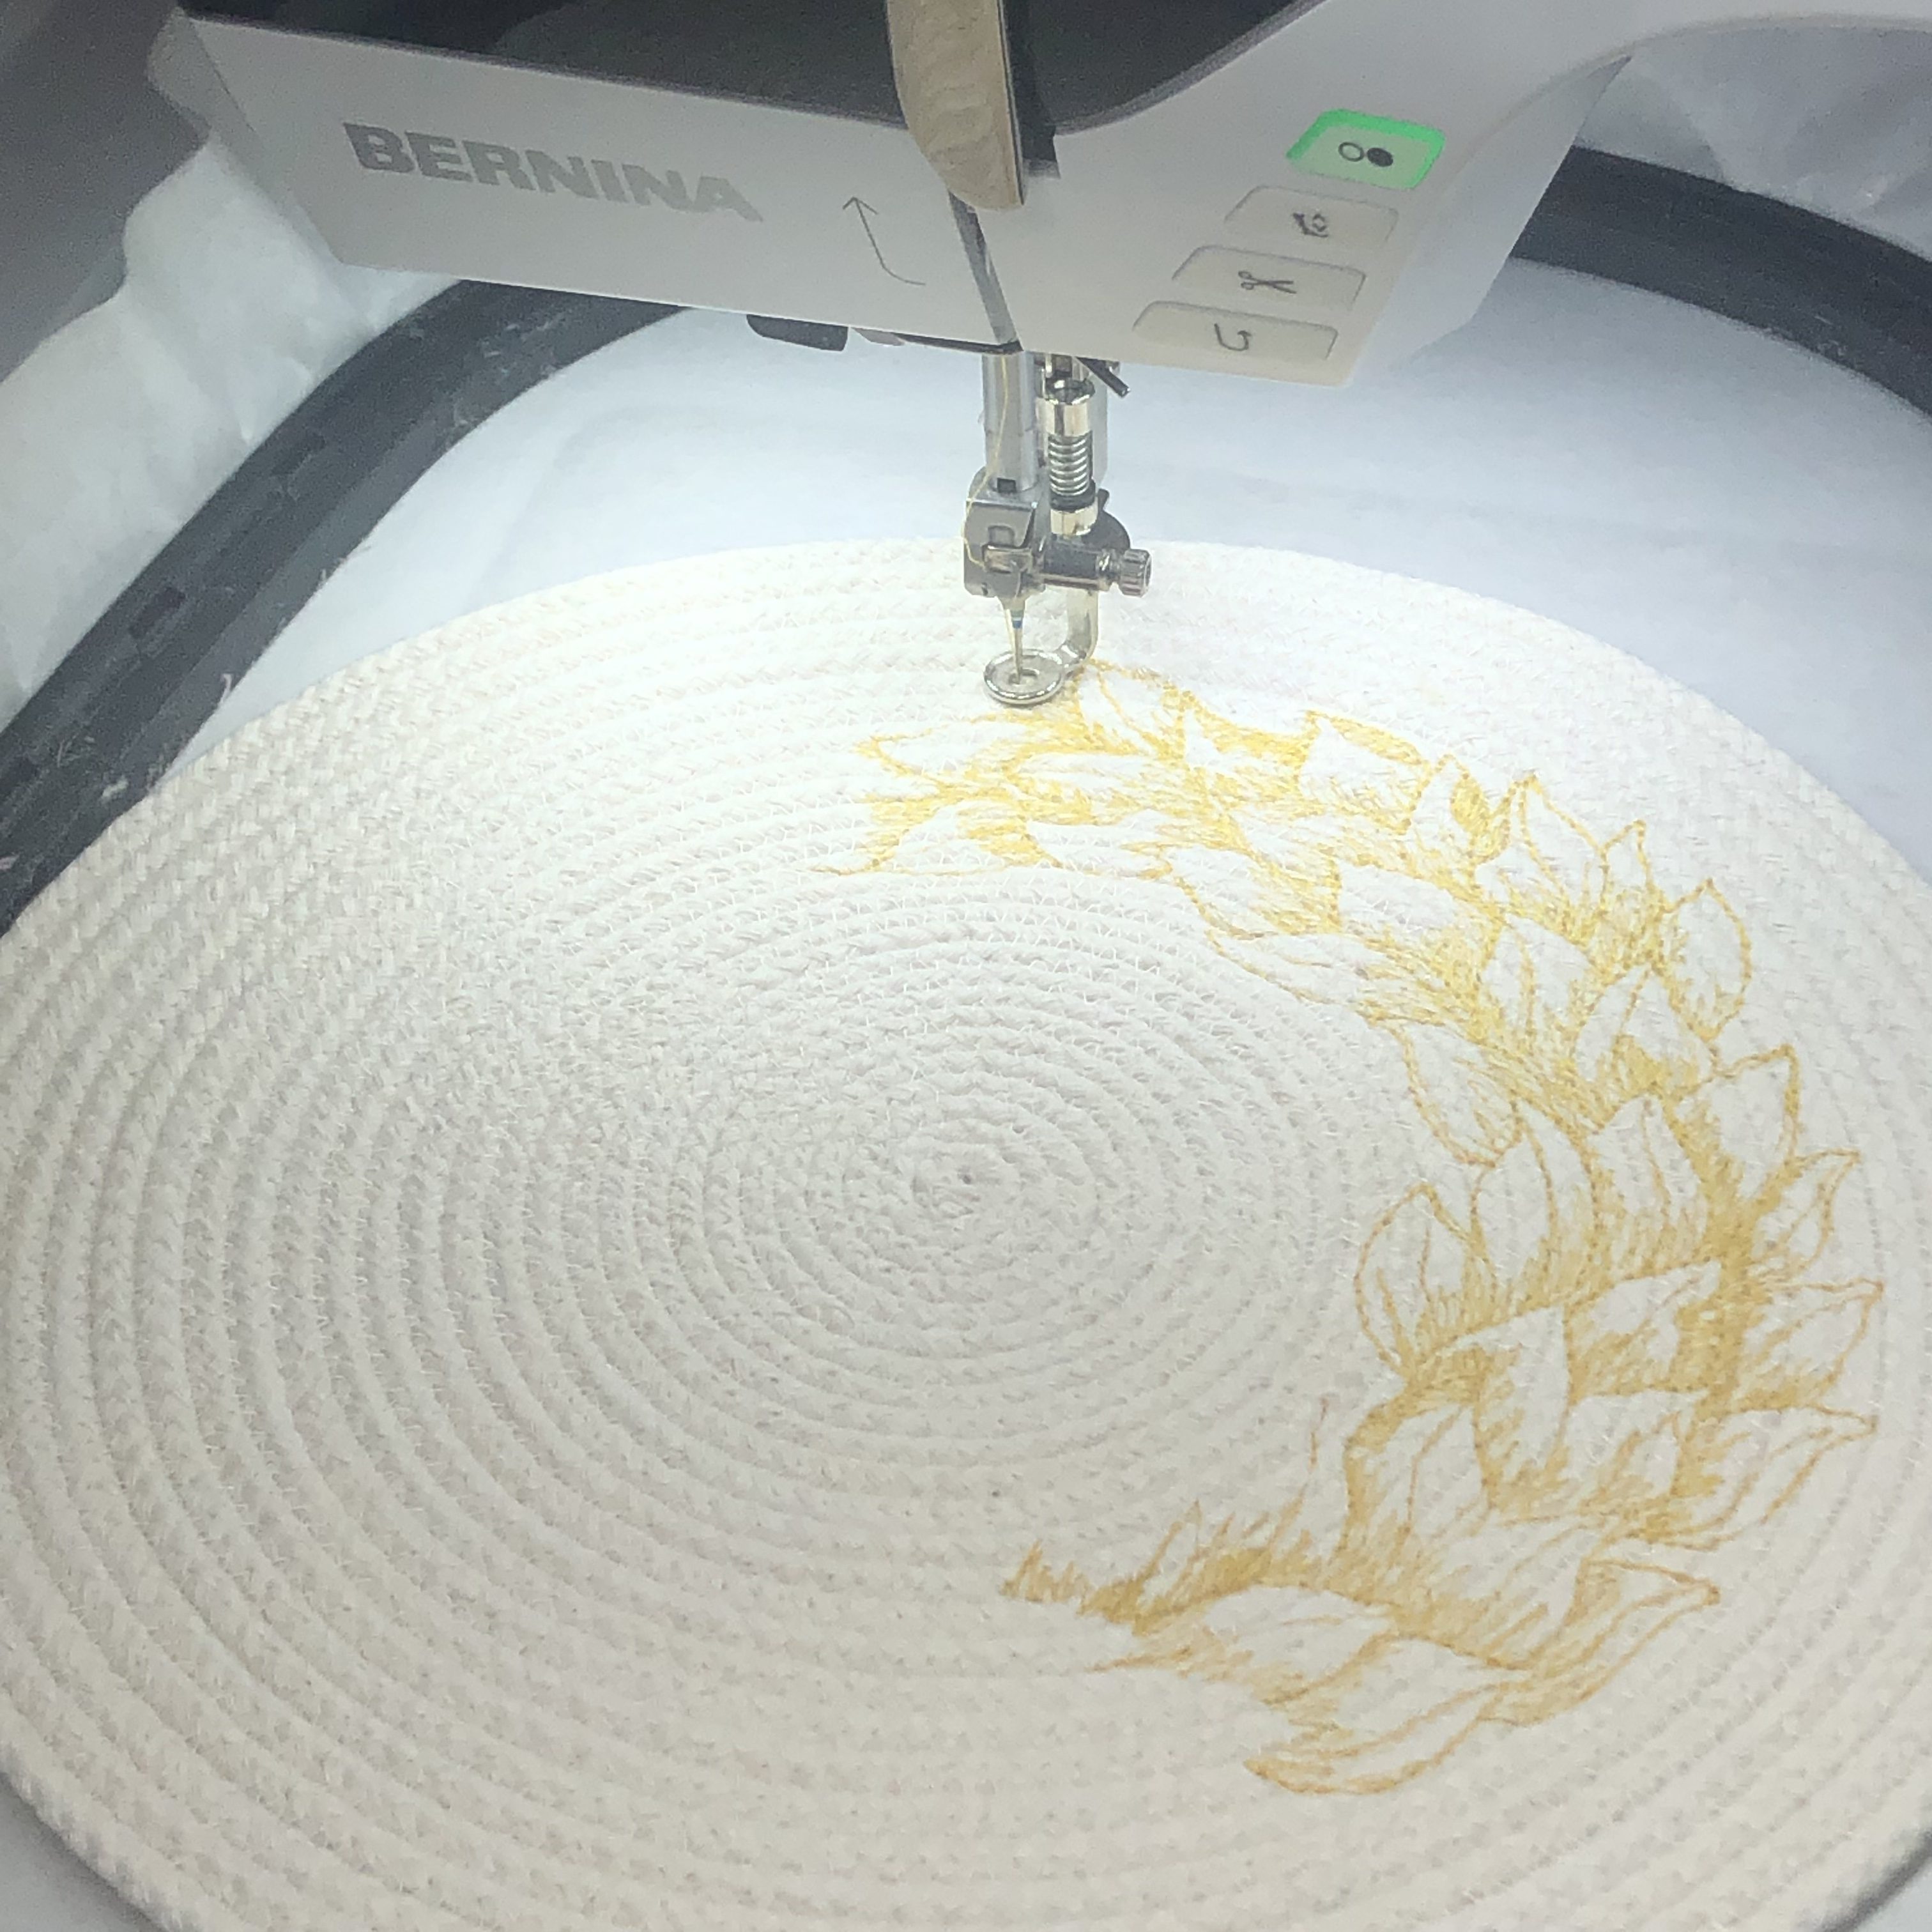
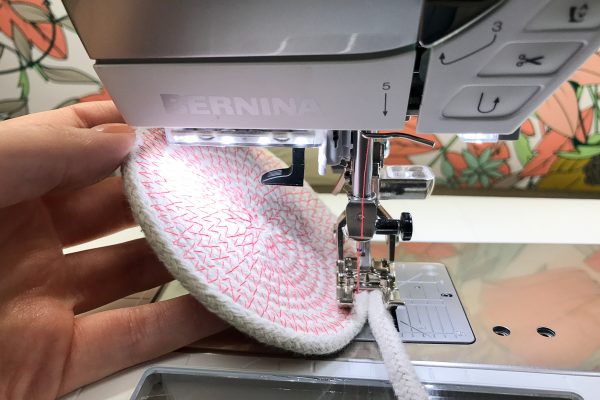
Bring up your design on your screen and use pinpoint placement or absolute check to center your design on your bowl base. Stitch out your design.
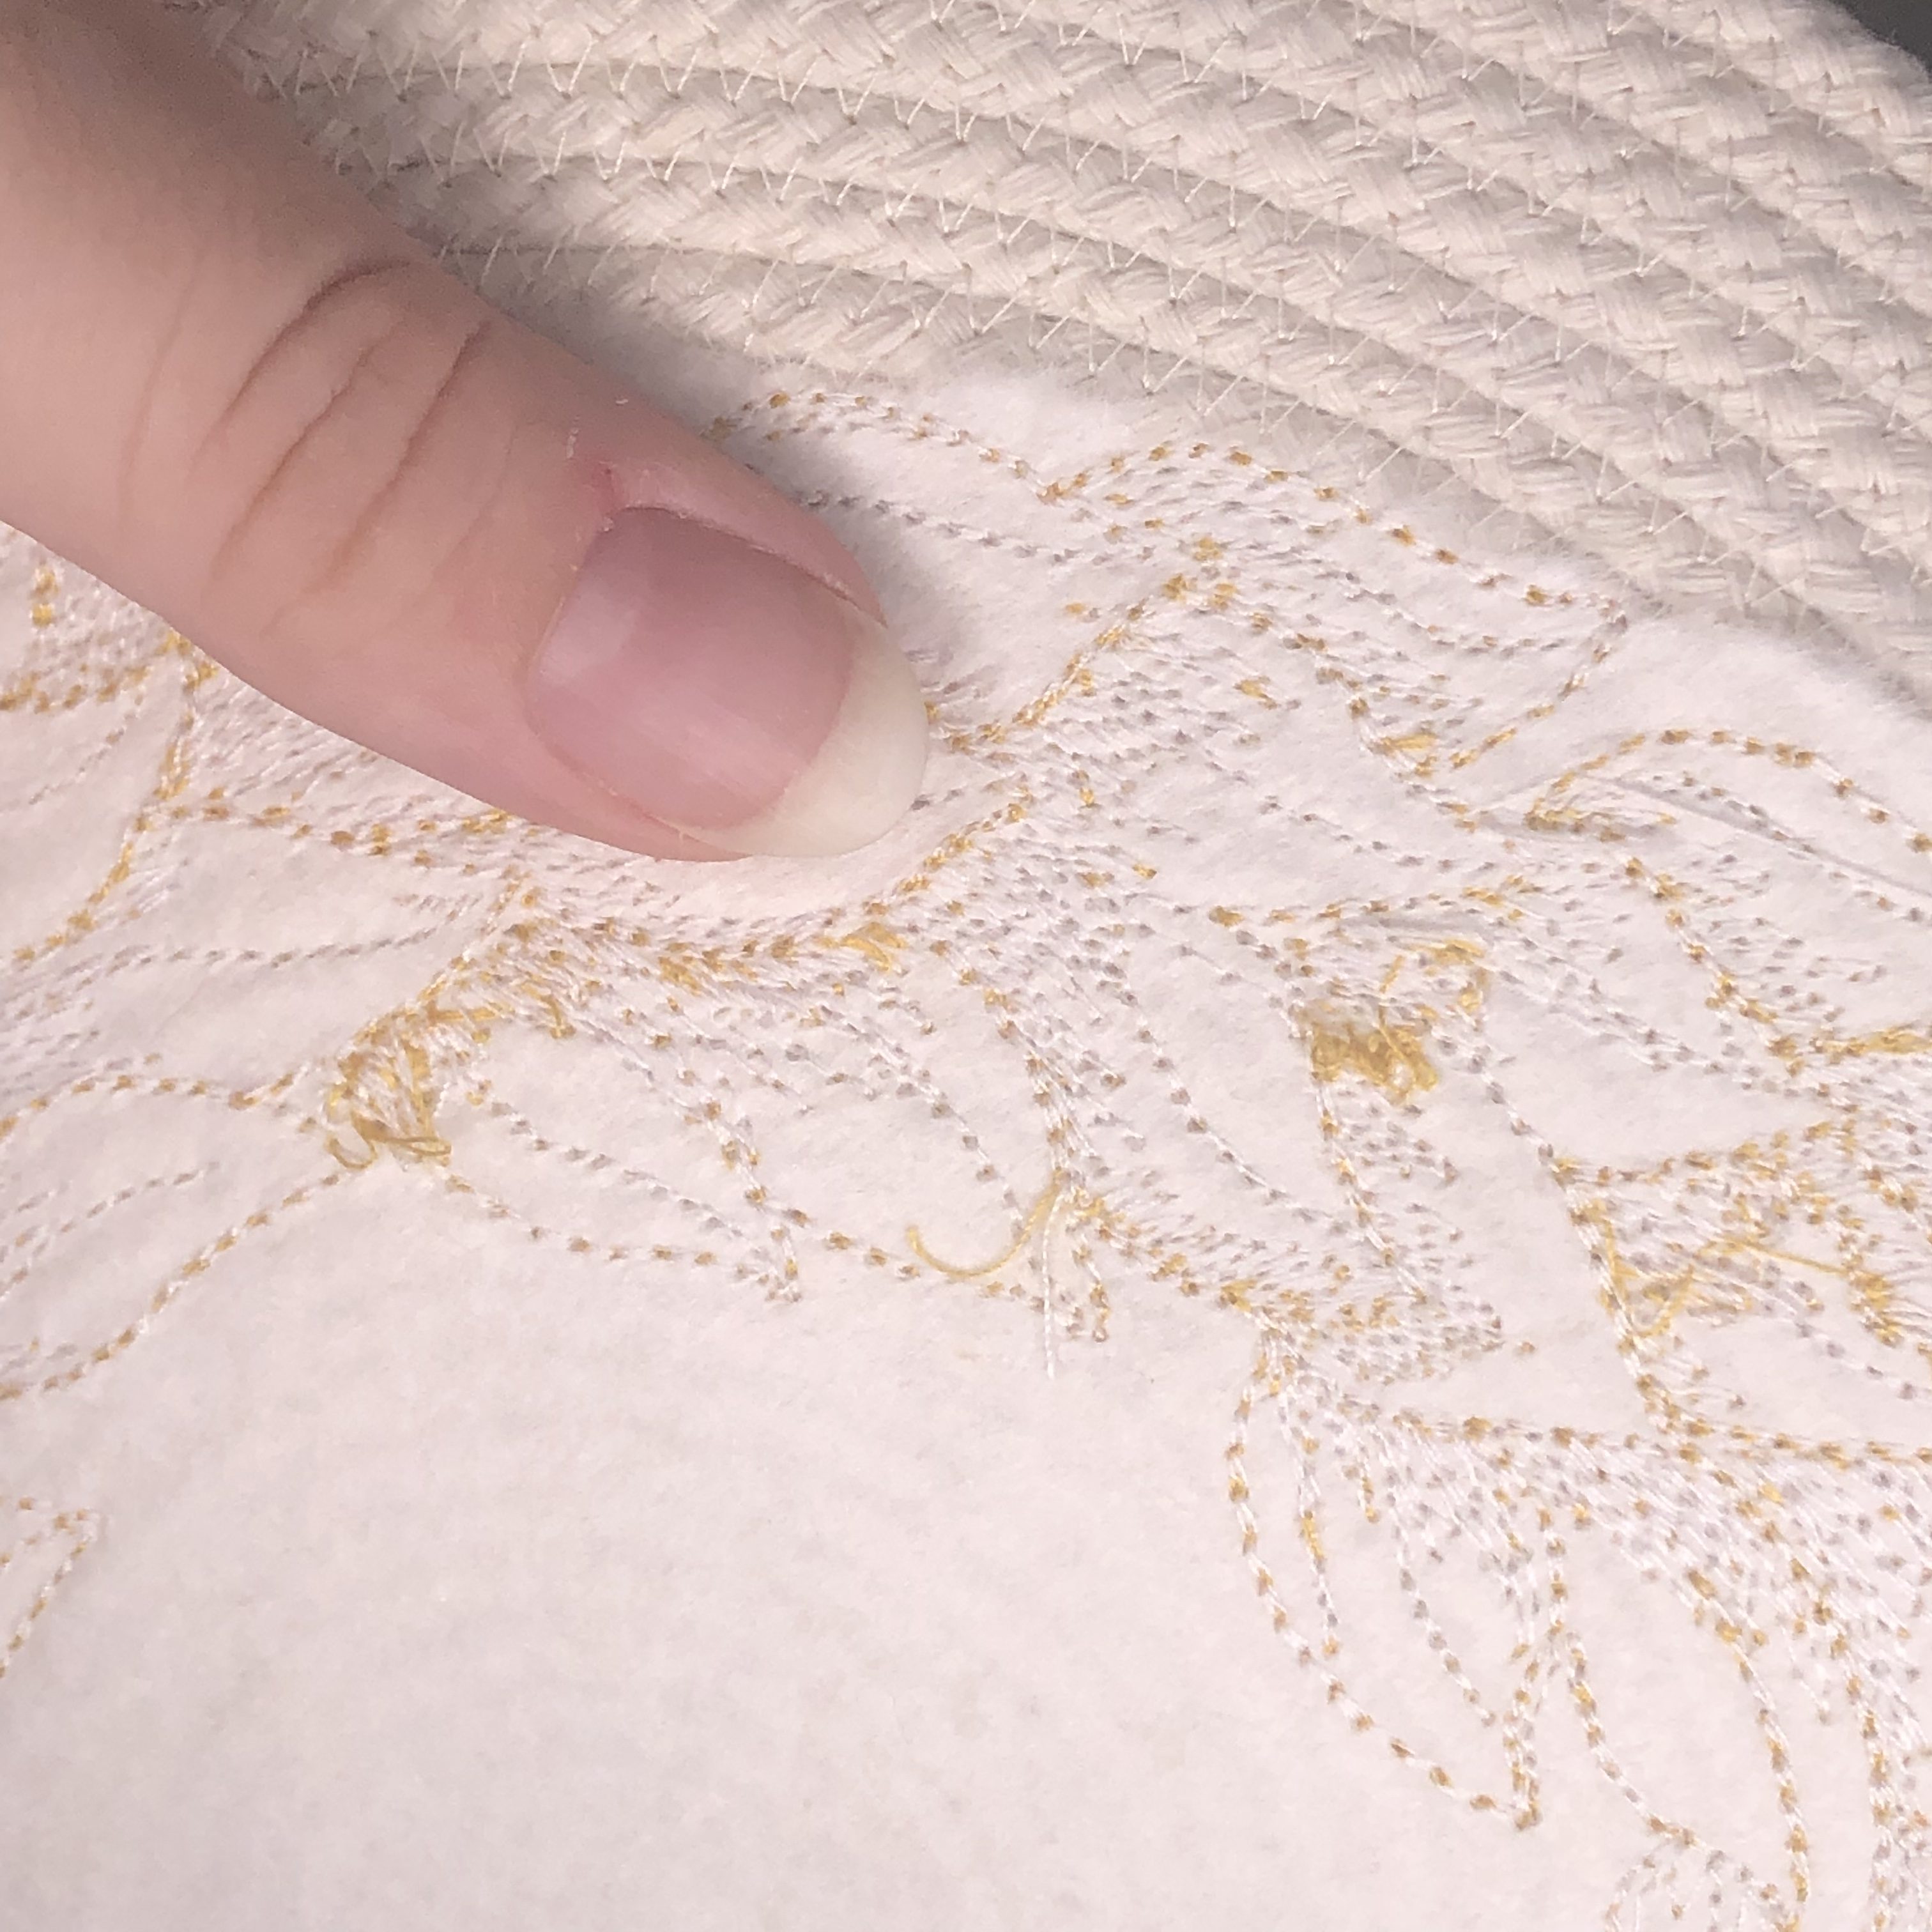
When the design is finished, remove the stabilizer from hoop. Support the stitches with your fingers and gently tear away the stabilizers from your bowl.
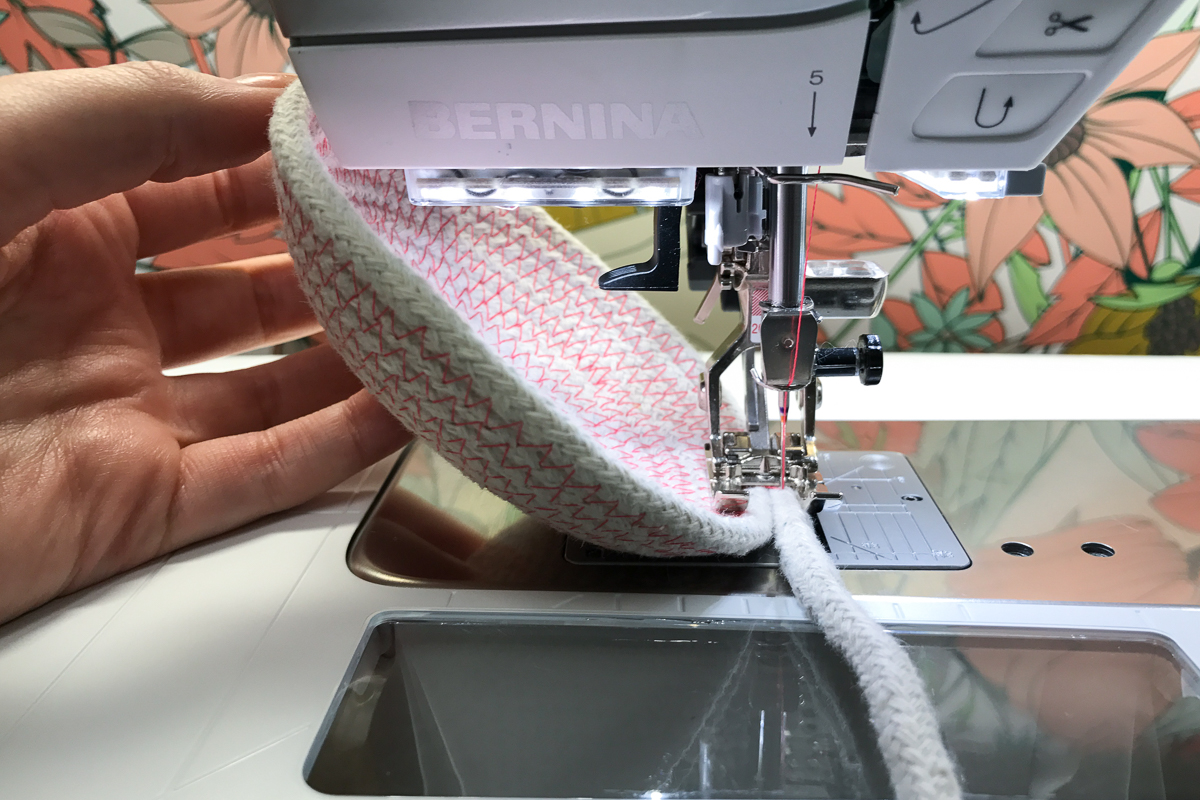
From here you can finish up your bowl by working through steps 5-8 on Hayley’s rope bowl tutorial.
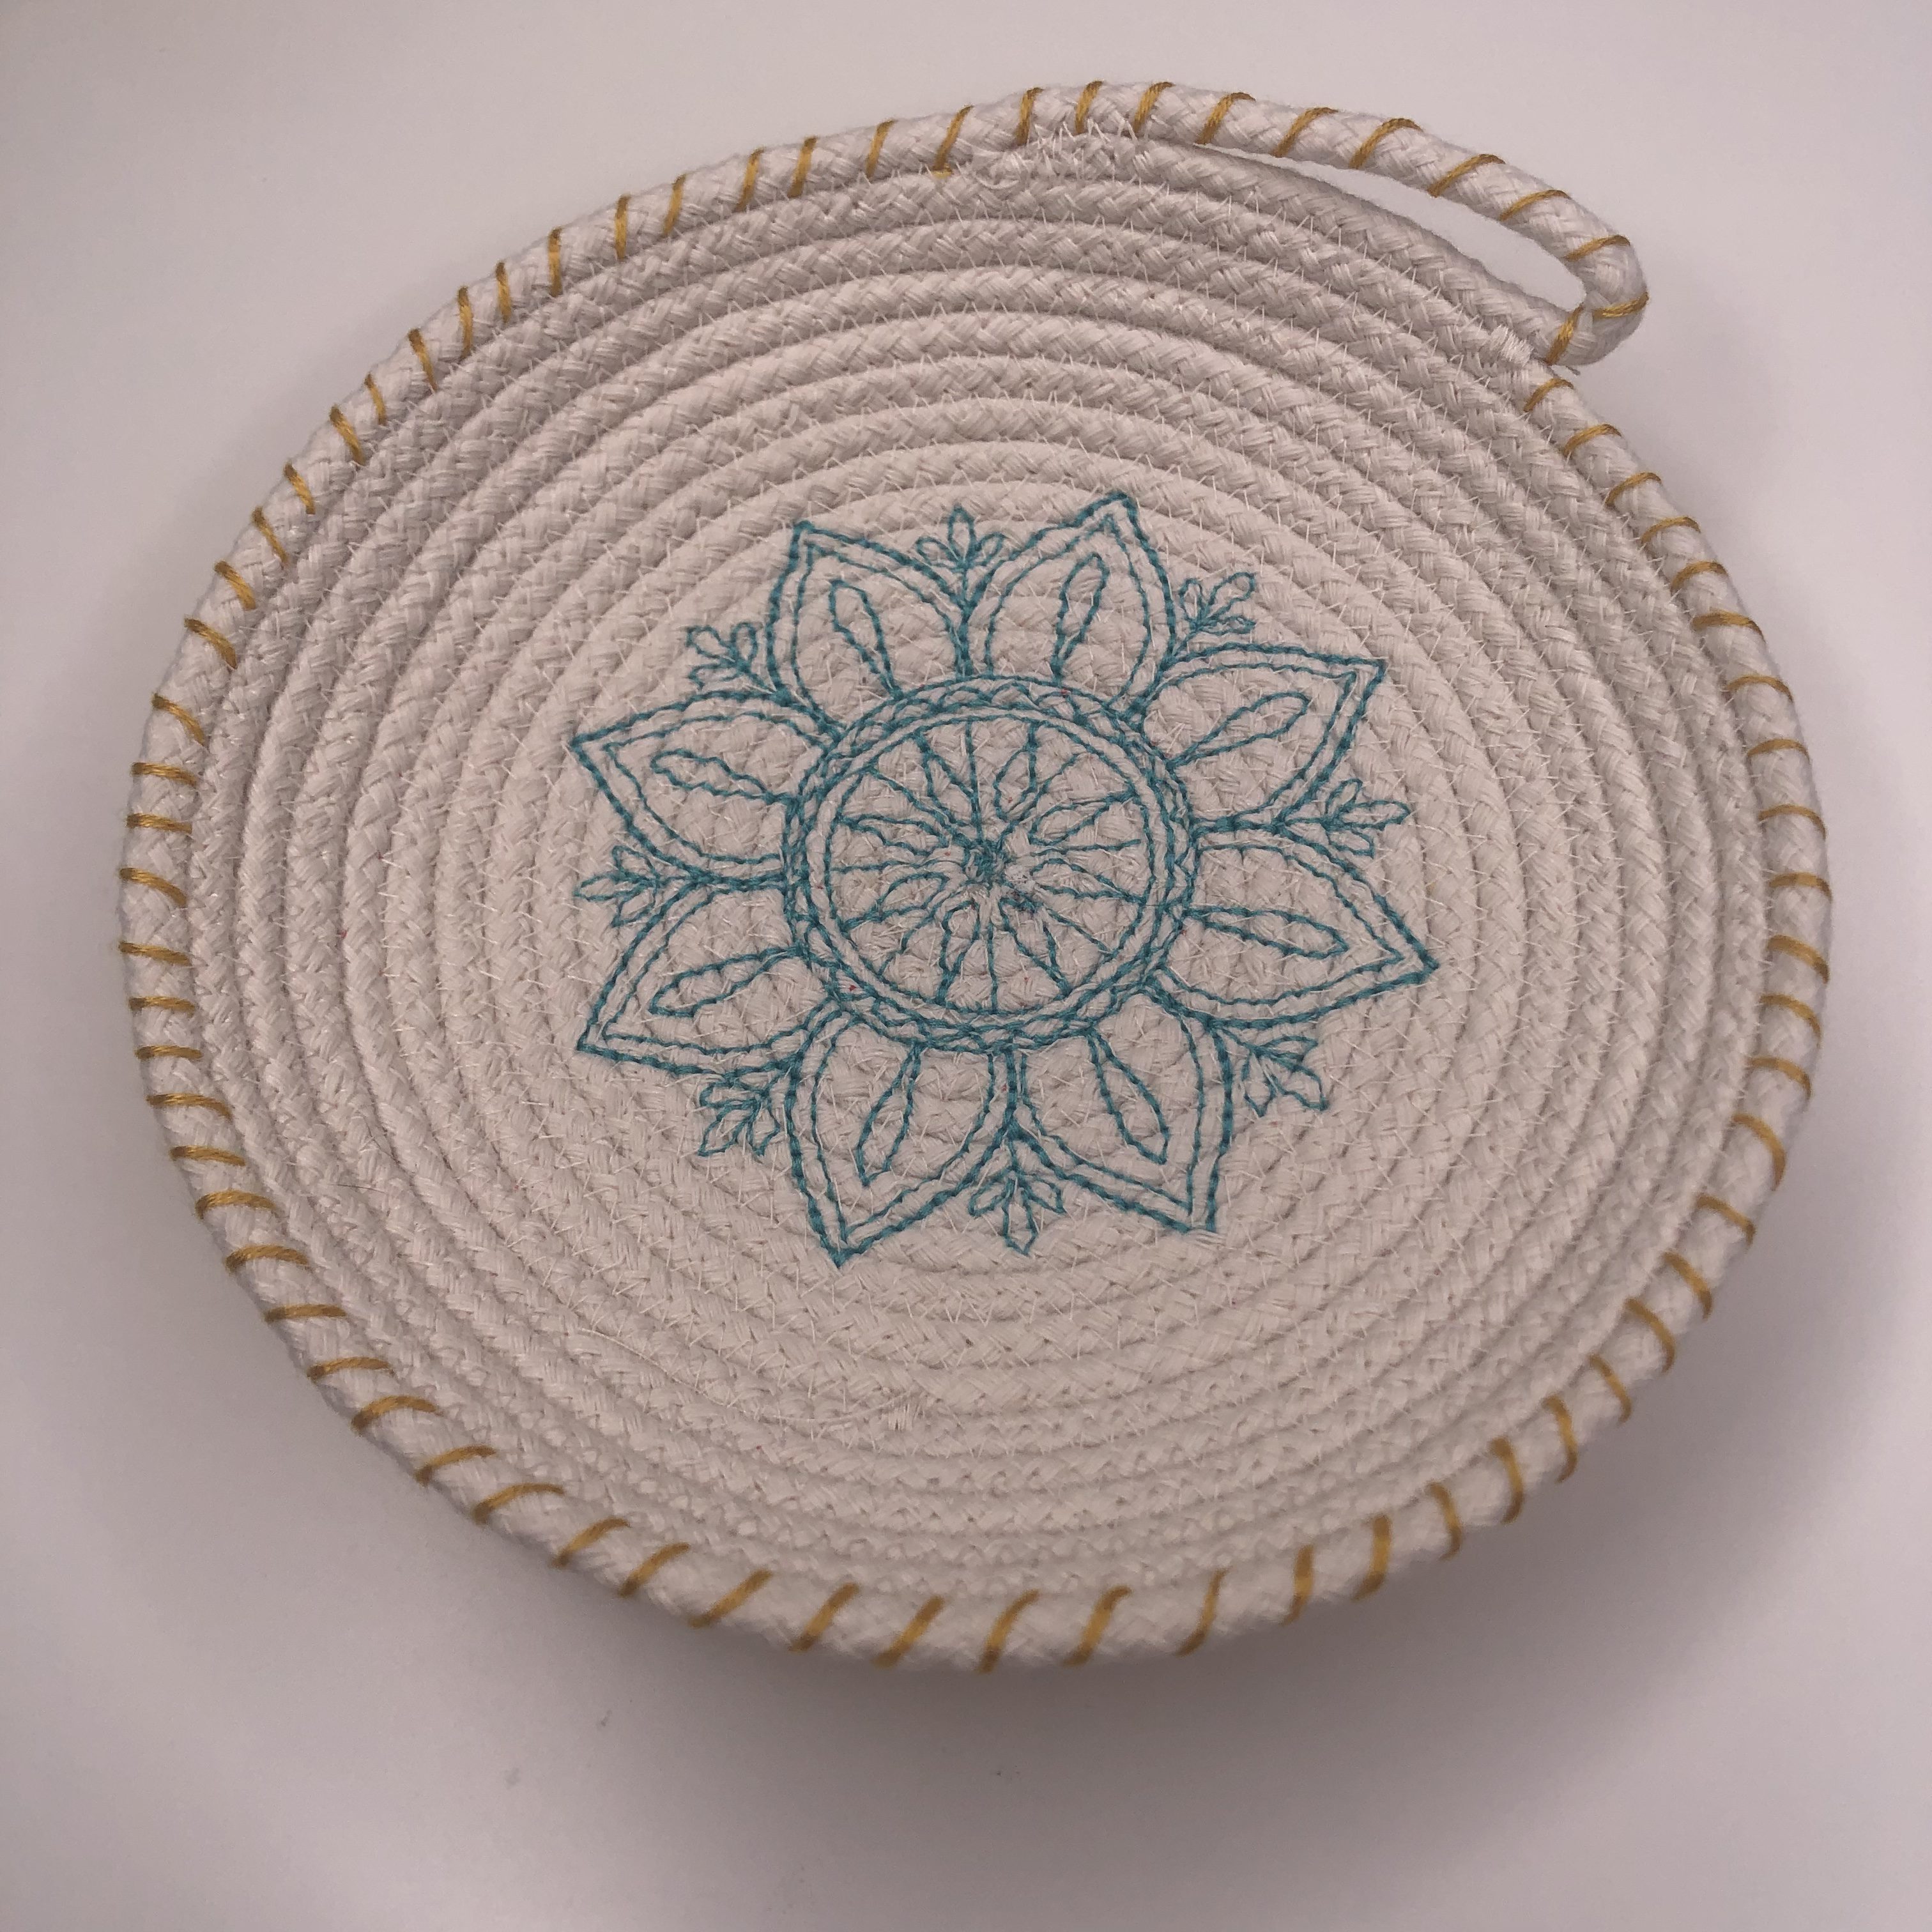
I decided that for this one I would keep it flat to make a trivet, and decided to wrap the cord in cotton yarn I had to add some fun texture and color to the design.
I can’t wait to see your embroidered rope bowls and how you personalize them. Now that I have started making them I can’t stop; I could just sit and make a dozen of them, easily! They are so fun and so cute.
-
New Paper Piecing Classes with Eileen
Eileen is a paper piecing EXPERT! Are you interested in learning more about paper piecing and advancing your skills?...
Read More -
5 Tips for a Smooth Start to Sewing
How can I prevent the fabric from being pulled into the bobbin case area when I start sewing? Especially when...
Read More -
Rachel's Staff Pick
Rachel's Staff Pick is this Blush by Clothworks fabric collection! She recommends this fabric because it has gorgeous watercolor effects,...
Read More -
Free-Motion Quilted Placemats
The tutorial will take the quilting design from a sketch on paper to four unique placemats that will help practice...
Read More -
How to Make a Fabric Mini Basket
We can never have enough storage and when it comes Christmas season, a handmade storage basket makes the best gift....
Read More -
Victor Location Press Release
(FROM GLOBE NEWSWIRE) Siblings Scott Perry and Alyssa McDonnell, hadn’t planned on quitting their careers as an engineer and a...
Read More -
December Sew-Along Event
Join us in-store or virtually for our Holiday Sew-Along event! This event is included in your 22/23 Club membership. Make a...
Read More -
Our Victor Store is OPEN!!
IT'S FINALLY HERE!! Our Victor store is OPEN!! We thank you for your patience while we have gotten our third store...
Read More -
International Quilt Market
After three very long years, the International Quilt Market has finally returned! Alyssa, Sheila and myself (Scott) just returned from...
Read More -
Victor Store Updates from Scott & Alyssa
We are SEW EXCITED to see our sewing family growing! We are progressing with getting our new Victor store ready. We...
Read More -
Carve your Pumpkins with us!
Getting your pumpkins ready for Halloween? Carve a pumpkin with this downloadable Aurora Sewing Center stencil! DOWNLOAD STENCIL Just pick which size...
Read More -
Fun Glow-in-the-Dark Projects with Wonderfil Thread
Want to do something that really stands out this Halloween? This easy project uses machine embroidery and glow in the...
Read More -
Cleaning & Oiling Your Machine
Remove hardware Before you start your machine cleaning, remove the needle, presser foot, stitch plate, and bobbin case from your...
Read More -
We Are Expanding to Victor, NY!
Aurora Sewing Center, which has two locations in the Buffalo, New York area, is sew excited to announce they are expanding their...
Read More -
Wonder Clips
Our staff member Laura LOVES using Wonder Clips when she is quilting! They hold quilt layers together better than just...
Read More -
Customer Appreciation Days
Join us for Customer Appreciation Days!! Deals will be running in-store Thursday, Sept. 1st - Saturday, Sept. 3rd. This event is...
Read More -
Why Do I Need Firmware Upgrades for My Sewing Machine?
Firmware is a software program or an updated set of instructions used in electronic-based sewing machines that are provided by our...
Read More -
Sewing & Quilting Health Benefits
Quilting is not only a fun and creative hobby, but it also has many health benefits that can improve your...
Read More -
Steps to Sew a Faux Button Placket
Step 1. Measuring Your Bodice To start you will need your front bodice piece cut out and laid flat. You...
Read More -
BERNINA District D Dealer of the Year
We have amazing news... DRUMROLL PLEASE! Aurora Sewing Center has been awarded the BERNINA District D Dealer of the Year!...
Read More
« Newer articles 1 2 3 Older articles »