Steps to Sew a Faux Button Placket
Step 1. Measuring Your Bodice
To start you will need your front bodice piece cut out and laid flat. You will measure the center front from the neckline to the bottom of the bodice. Mine measures almost 9 inches. Next, you’ll need to decide how wide you’d like your finished placket and then do a little math to figure out how wide you’ll need to cut your faux placket piece. I’m going to make mine 1 inch wide finished. You’ll need to double that and also include an allowance to fold over the raw edges. I’m going to press mine in .25 inches on each side, so I’ll add .5 inches plus 2 inches and cut my placket piece at 9 inches tall and 2.5 inches wide.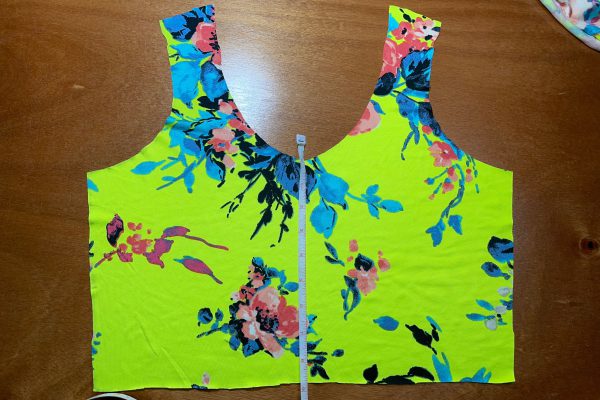
Step 2. Preparing Your Placket Piece
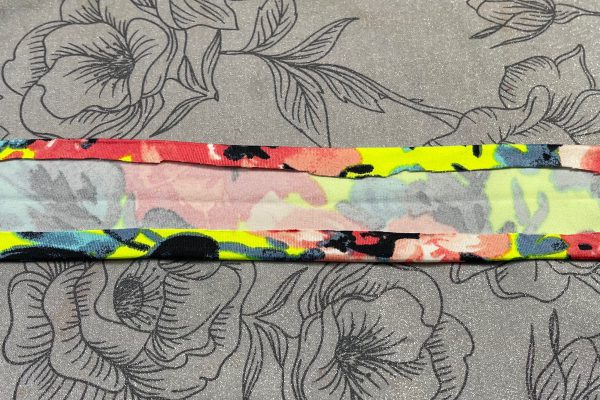
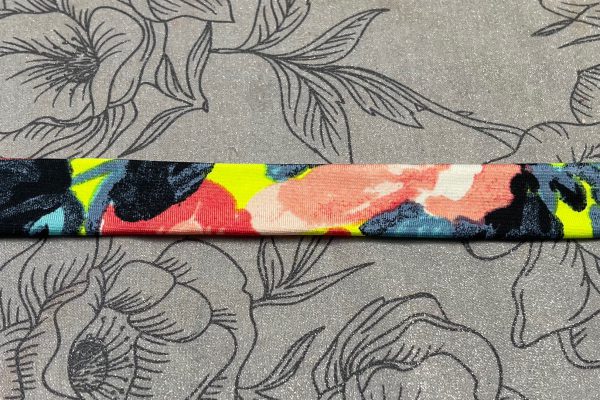
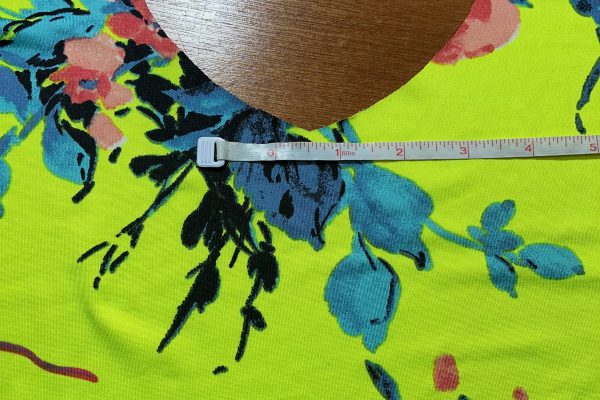
Once you’ve cut your faux placket piece you will fold over and press your long raw edges whatever amount you allowed for, in my case .25 inches on each side. Then fold the placket piece in half matching the folded under edges and press.
Step 3. Sewing on the Placket Piece
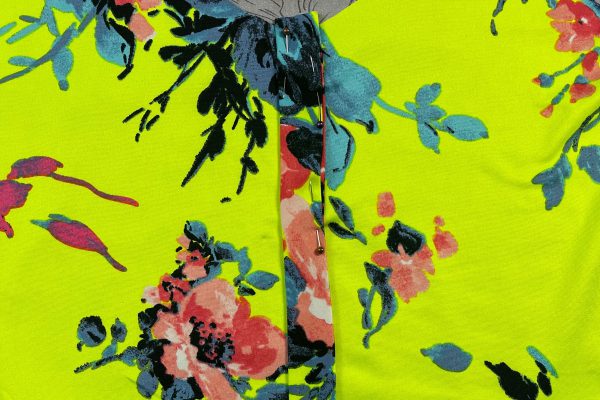
Now take your placket piece and place it on the center front of your bodice piece. You can secure it in place with pins or wondertape. Sew down both sides, securing the placket to your front bodice.
Step 4. Sewing on the Buttons
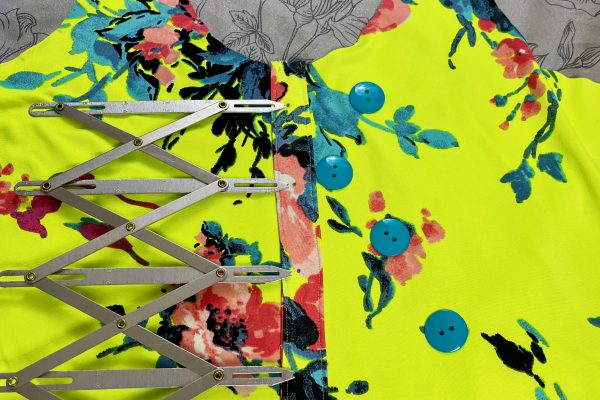
Now it’s time to add the buttons! I use a button gauge to mark mine so I know that they are spaced evenly apart. Determine how many buttons you’d like and how far apart you would like them spaced. Mark the button placement with a washable maker of your choice. Be sure your top button and bottom button are placed far enough away from the edges so that they will not be in the seam allowance when you are attaching your neckband and skirt.
Once you’ve marked your button placement you can sew them on using the method of your choosing.
Tutorial from JESSICA RABBITT
-
Incorporating Embroidery into Quilts: Creative Ways to Add Embroidered Details to Quilts
Quilting is a time-honored craft cherished for its blend of artistry and tradition. Adding embroidery to your quilting projects elevates...
Read More -
Start the New Year Sewing with Confidence and Creativity at Aurora Sewing Center
January is the perfect time to dive into new hobbies or rediscover ones that have been waiting for a fresh...
Read More -
Join Our Holiday Sew Along: Create Quick and Festive Gifts with Aurora Sewing Center!
There’s no better way to get into the holiday spirit than by sewing unique, heartfelt gifts and decorations. Aurora Sewing...
Read More -
Stitch Up Some Seasonal Magic: Gift Ideas for Sewists & Quilters
The holiday season is just around the corner, and you know what that means—exciting Black Friday and Cyber Monday deals...
Read More -
What could possibly be new with the latest Sewing Machines?
Are you wondering what could possibly be NEW from the top sewing machine manufacturers? Well, 2024 and 2025 are shaping...
Read More -
Tips on using a Ruffler Foot Attachment
Have you ever used a Ruffler before? At a glance, the Ruffler Attachment can look a bit scary, however once...
Read More -
Threads of Compassion: Raising Funds to Stitch Together Community Support
Aurora Sewing Center’s 38th Annual Banquet at marked another year of celebration and giving back to the community. Held each...
Read More -
2024 Aurora Sewing Center's Annual TENT SALE! (Williamsville store location) Jun 6th -8th
You don't want to miss our Annual TENT SALE at our Williamsville store location! We've MOVED the sale to our Back...
Read More -
Is it time to get your sewing machine SERVICED?
Is it time to get your sewing machine serviced? Have you been sewing a fair bit getting those projects done? ...
Read More -
2023 Customer Appreciation Days
Calling all sewing enthusiasts! Clear your schedules for September 14-16 because Aurora Sewing Center's much-anticipated Annual Customer Appreciation Days are...
Read More -
Expanding Our Product Offering
Aurora Sewing Center is proud to announce an exciting expansion of our sewing machine offering. We are thrilled to introduce...
Read More -
Sew Outside and Enjoy the Outdoors!
Here is New York, nice warm weather can be limited to four months or so. Most of us try to...
Read More -
2023 Club Banquet ... A Night of Generosity and Thanks
What is the Aurora Sewing Center CLUB? There are actually three different Clubs (Sewing Club, Embroidery Club and Serger Club). ...
Read More -
2023 Shop Hop
Join Aurora Sewing Center and many other local quilt shops for "The Great NY Shop Hop 2023"! The Shop Hop runs from June...
Read More -
Victor GRAND OPENING WEEK Schedule
Aurora Sewing Center, is sew excited to be celebrating the Grand Opening throughout the week of May 1st, 2023...
Read More -
Pop-in Demo Day during our Victor GRAND OPENING!
Join us in Victor on Wednesday, May 3rd from 11AM - 4PM for a Pop-in Demo Day! Kimberbell Embroidery...
Read More -
What to Think About When it Comes to Sergers!
April is NATIONAL SERGER MONTH, and sergers have come a long way with their ease of threading and use. There...
Read More -
Clever Quilting Event with BERNINA
THREE SESSIONS AVAILABLE: MAY 5TH, 9:30AM - 1PM: REGISTER HERE MAY 5TH, 2PM - 5:30PM: REGISTER HERE MAY 6TH, 10AM...
Read More -
Quilting Thread Types & Differences
Sewing and quilting is an art form that requires attention to detail, the right equipment, and right sewing supplies. When...
Read More -
Curvy Coasters Tutorial
Curves are generally seen as a more advanced technique when it comes to quilt piecing. Quilts based on a Drunkard’s...
Read More -
In-Store Home Show SALES!
We won't be in our usual spot at the Buffalo Home Show this year BUT GOOD NEWS! We are still...
Read More
1 2 3 Older articles »

